In this video tutorial I will go over how to create BW presets in Adobe Lightroom 4. It’s a very simple yet powerful feature that can drastically speed up your workflow if taken advantage of!! I have tons of presets and use them all the time. I also create presets for specific events and name them accordingly for future use. I’ll show you how to create a basic preset, then I’ll show you how to save it and create a Preset Folder. I will then show you quickly how to export and import the presets this way you can share them with your friends super easy!!
I also put together a BW preset that that you can download Here>>. This will get you some nice starting points for high contrast conversions that I often like to use. Check out the example photos below the video of each individual preset!
Check out the Lightroom 4 HD Video Tutorial
In the very beginning of the Lightroom 4 HD Video tutorial, I go over the guide tabs above on the website as I’ve been getting a lot of questions lately on a variety of topics!! The Guides cover a ton of information and I just wanted to make sure that you all know they are up there to take advantage of if needed 😉
Be sure to select the HD option in the player settings once the video starts!!
SonyAlphaLab.com’s Free BW Preset for Lightroom
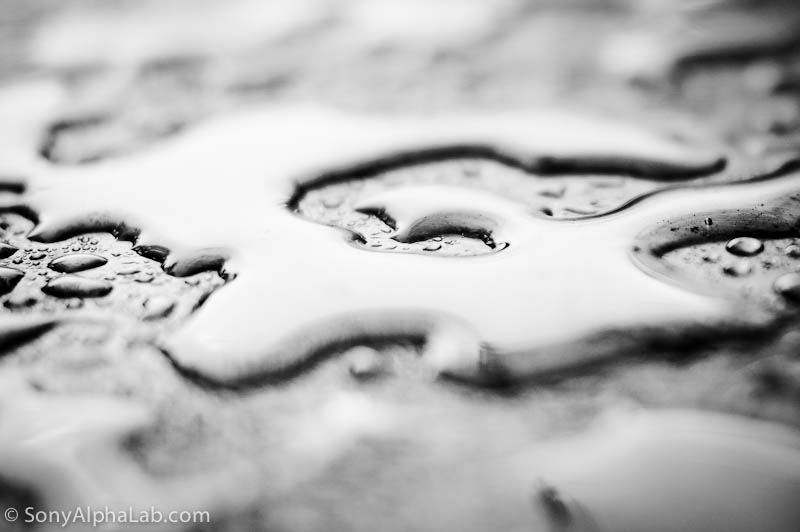
This Lightroom BW Preset is called “BW – High Contrast Sharp”, and is great for high contrast conversions.
Check out this before and after:
Original Photo – Before
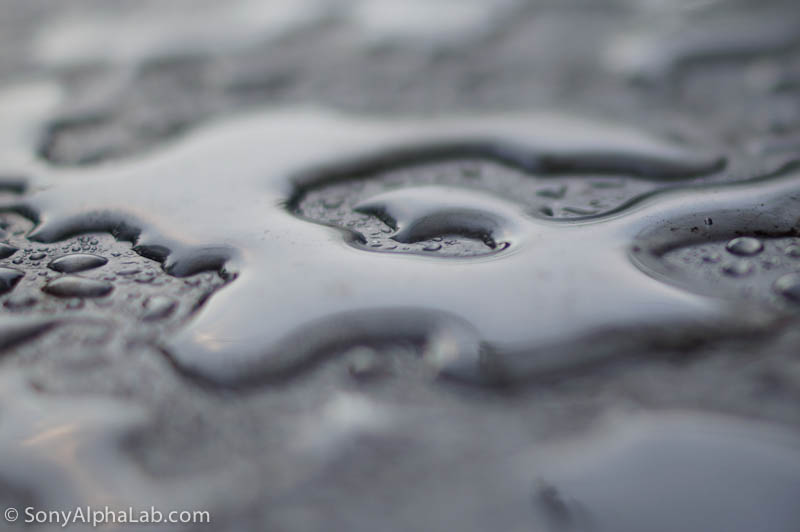
BW – High Contrast Sharp Preset for Lightroom – After
Simple clicking the preset developed the Photograph to look like this with no effort at all on your part. I recommend making a virtual copy first so you have the original file untouched if you need it.

BW – High Contrast Sharp Preset for Lightroom (Click Here to download)
Simple unzip the file and import it into your Lightroom Presets! Then click away on a few photos and enjoy 🙂
Thanks for looking,
Jay


