The new Sony A7s has a very powerful video format called XAVC S, which allows for a customizable picture profile called S-Log2. In this article I will show you how to set the camera in order to use it. You must be using the XAVC S file format and have a SDXC memory card that will support the XAVC format. I purchased the PNY 64GB Elite XDXC card and so far so good. I only had the normal Sandisk SDHC cards before this one and the do not allow for the XAVC format. The Camera actual says “this card does not support the format”
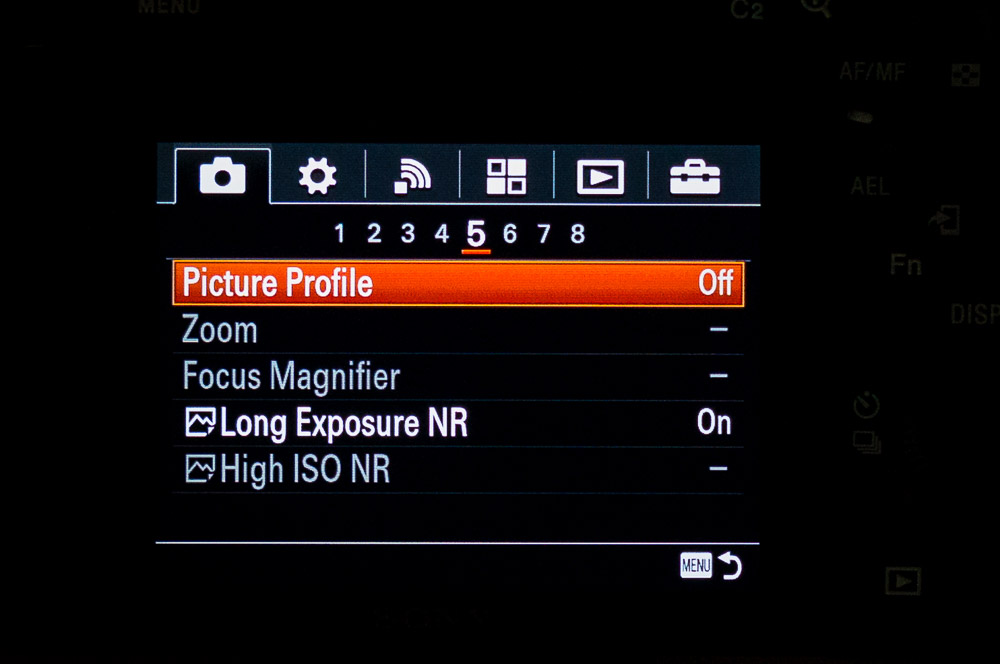
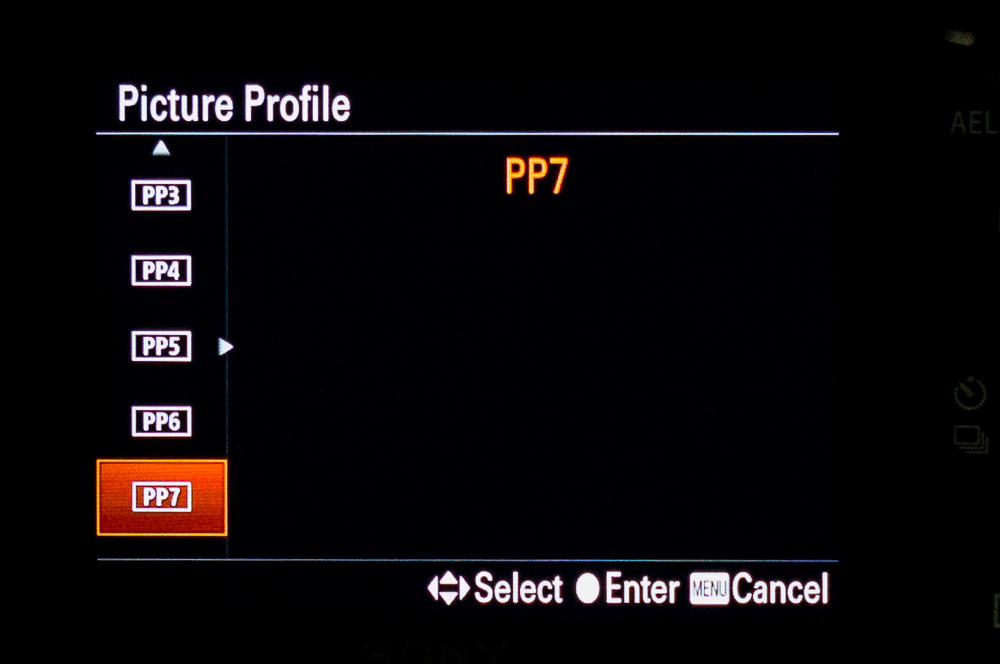
In order to take advantage of the S-Log2 profile you will need to enable the correct picture profile in the menu on the Sony A7s. Picture Profile #7 to be specific! Once you do this the LCD screen will display a more flat color representing the profile. Basically you get more dynamic range to work with then you would using the normal default profile. Sort of like a raw video file I guess is one way to think about it, so it has neutral colors and more dynamic range available in post.
Once you select the picture profile you want, you can arrow over to the right and adjust all the individual profile parameters as you see fit. See below for Sony A7S Menu Screen shots!
You can customize the picture quality by adjusting picture profile items such as [Gamma] and [Detail]. When setting these parameters, connect the camera to a TV or monitor, and adjust them while observing the picture on the screen.
MENU (Camera Settings) [Picture Profile] the profile you want to change.
Move to the item index screen by pressing the right side of the control wheel.
Select the item to change using the up/down sides of the control wheel.
Select the desired value using the up/down sides of the control wheel and press in the center.
[divider]
Using the preset of the picture profile
The default settings [PP1] through [PP7] for movies have been set in advance in the camera based on various shooting conditions. MENU (Camera Settings) [Picture Profile] desired setting.
PP1:
Example setting using [Movie] gamma
PP2:
Example setting using [Still] gamma
PP3:
Example setting of natural color tone using the ITU709 gamma
PP4:
Example setting of a color tone faithful to the [ITU709] standard
PP5:
Example setting using [Cine1] gamma
PP6:
Example setting using [Cine2] gamma
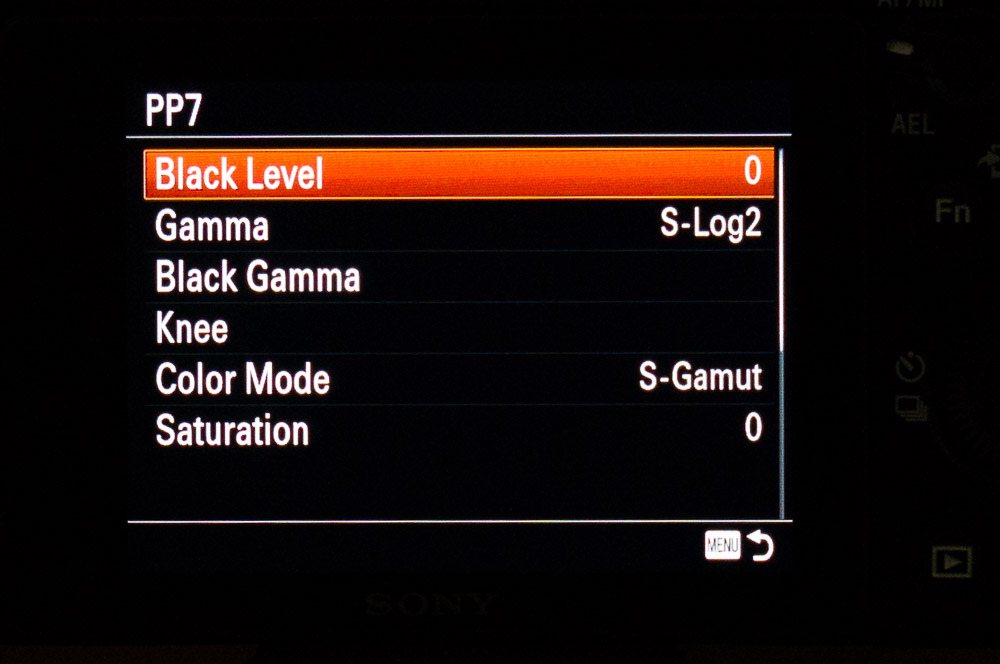
PP7:
Example setting using [S-Log2] gamma
[divider]
Items of the picture profile
Black Level
Sets the black level. (–15 to +15)
Gamma
Selects a gamma curve.
Movie: Standard gamma curve for movies
Still: Standard gamma curve for still images
Cine1: Softens the contrast in dark parts and emphasizes gradation in bright parts to produce a relaxed color movie. (equivalent to HG4609G33)
Cine2: Similar to [Cine1] but optimized for editing with up to 100% video signal. (equivalent to HG4600G30)
Cine3: Intensifies the contrast in light and shade more than [Cine1] and [Cine2] and strengthens gradation in black.
Cine4: Strengthens the contrast in dark parts more than [Cine3]. The contrast in dark parts is lower and the contrast in bright parts is higher than for [Movie].
ITU709: Gamma curve that corresponds to ITU-709.
ITU709(800%): Gamma curve for confirming scenes on the assumption of shooting using [S-Log2].
S-Log2: Gamma curve for [S-Log2]. This setting is based on the assumption that the picture will be processed after shooting.
Black Gamma
Corrects gamma in low intensity areas.
Range: Selects the correcting range. (Wide / Middle / Narrow)
Level: Sets the correcting level. (-7 (maximum black compression) to +7 (maximum black stretch))
Knee
Sets knee point and slope for video signal compression to prevent over-exposure by limiting signals in high intensity areas of the subject to the dynamic range of your camera. When selecting [Still], [Cine1], [Cine2], [Cine3], [Cine4], [ITU709(800%)], [S-Log2] in [Gamma], [Knee] is set to [Off] if [Mode] is set to [Auto]. To use functions in [Knee], set [Mode] to [Manual].
Mode
Selects auto/manual settings.
Auto: The knee point and slope are set automatically.
Manual: The knee point and slope are set manually.
Auto Set
Settings when [Auto] is selected.
Max Point: Sets the maximum point of the knee point. (90% to 100%)
Sensitivity: Sets the sensitivity. (High / Mid / Low)
Manual Set: Settings when [Manual] is selected.
Point: Sets the knee point. (75% to 105%)
Slope: Sets the knee slope. (-5 (gentle) to +5 (steep))
Color Mode
Sets type and level of colors.
Movie: Suitable colors when [Gamma] is set to [Movie].
Still: Suitable colors when [Gamma] is set to [Still].
Cinema: Suitable colors when [Gamma] is set to [Cine1].
Pro: Similar color tones to the standard image quality of Sony professional cameras (when combined with ITU-709 gamma)
ITU709 Matrix: Colors corresponding to ITU-709 standard (when combined with ITU-709 gamma)
Black & White: Sets the saturation to zero for shooting in black and white.
S-Gamut: Setting based on the assumption that the pictures will be processed after shooting. Used when [Gamma] is set to [S-Log2].
Saturation
Sets the color saturation. (-32 to +32)
Color Phase
Sets the color phase. (-7 to +7)
Color Depth
Sets the color depth for each color phase. This function is more effective for chromatic colors and less effective for achromatic colors. The color looks deeper as you increase the setting value towards the positive side, and lighter as you decrease the value towards the negative side. This function is effective even if you set [Color Mode] to [Black & White].
[R] -7 (light red) to +7 (deep red)
[G] -7 (light green) to +7 (deep green)
[B] -7 (light blue) to +7 (deep blue)
[C] -7 (light cyan) to +7 (deep cyan)
[M] -7 (light magenta) to +7 (deep magenta)
[Y] -7 (light yellow) to +7 (deep yellow)
Detail
Sets items for [Detail].
Level: Sets the [Detail] level. (-7 to +7)
Adjust: The following parameters can be selected manually.
Mode: Selects auto/manual setting. (Auto (automatic optimization) / Manual (The details are set manually.))
V/H Balance: Sets the vertical (V) and horizontal (H) balance of DETAIL. (-2 (off to the vertical (V) side) to +2 (off to the horizontal (H) side))
B/W Balance: Selects the balance of the lower DETAIL (B) and the upper DETAIL (W). (Type1 (off to the lower DETAIL (B) side) to Type5 (off to the upper DETAIL (W) side))
Limit: Sets the limit level of [Detail]. (0 (Low limit level: likely to be limited) to 7 (High limit level: unlikely to be limited))
Crispning: Sets the crispening level. (0 (shallow crispening level) to 7 (deep crispening level))
Hi-Light Detail: Sets the [Detail] level in the high intensity areas. (0 to 4)
Copy
Copies the settings of the picture profile to another picture profile number. MENU (Camera Settings) [Picture Profile][Copy]
Reset
Resets the picture profile to the default setting. You cannot reset all picture profile settings at once. MENU (Camera Settings) [Picture Profile][Reset]
Note
Since the parameters are shared for movie and still images, adjust the value when you change the shooting mode.
If you print RAW images with shooting settings, the following settings are not reflected.
Black Level
Black Gamma
Knee
Color Depth
If you change [Gamma], the available ISO value range changes.
There may be more noise in dark parts depending on the gamma settings. It may improve by setting the lens compensation to [Off].
When using S-Log2 gamma, the noise becomes more noticeable compared to when using other gammas. If the noise still is significant even after processing pictures, it may be improved by shooting with a brighter setting. However, the dynamic range becomes narrower accordingly when you shoot with a brighter setting. We recommend checking the picture in advance by test shooting when using S-log2.
Setting [ITU709(800%)] or [S-Log2] may cause an error in the white balance custom setup. In that case, set the exposure bright first and then perform custom setup.
Setting [ITU709(800%)] or [S-Log2] disables the [Black Level] setting.
If you set [Slope] to +5 in [Manual Set], [Knee] is set to [Off].
S-Gamut is a color space unique to Sony that provides a wide color space equivalent to film cameras. However, S-Gamut setting of this camera does not support the whole color space of S-Gamut; it is a setting to realize a color reproduction equivalent to S-Gamut.
MENU ? (Camera Settings) ? [File Format] ? desired setting.
Menu item details
XAVC S: Records 60p/50p/30p/25p/24p*/120p/100p movies in XAVC S format. This file format is suitable for high bit rates. *Only for 1080 60i compatible models. Audio: LPCM
You cannot create discs using the software PlayMemories Home with movies that are recorded with [File Format] set to [XAVC S].
When recording movies with [File Format] set to [XAVC S], you will need an SDXC memory card up to 64 GB (Class 10 or faster), a UHS-I compatible SDXC memory card up to 64 GB or Memory Stick XC-HG Duo media.
AVCHD (default setting): Records 60i/50i/60p/50p/24p/25p movies in AVCHD format. This file format is suitable for high-definition TV. You can create a Blu-ray Disc, an AVCHD recording disc, or a DVD-Video disc using the software PlayMemories Home. Audio: Dolby Digital MP4: Records mp4 (AVC) movies. This format is suitable for WEB uploads, e-mail attachments, etc. Audio: AAC
You cannot create a disc using the software PlayMemories Home with a movie that was recorded when [File Format] was set to [MP4].
Sony A7s Menu Screen Shots
Sony A7s Menu – File Format
Sony A7s Menu – XAVC S File Format
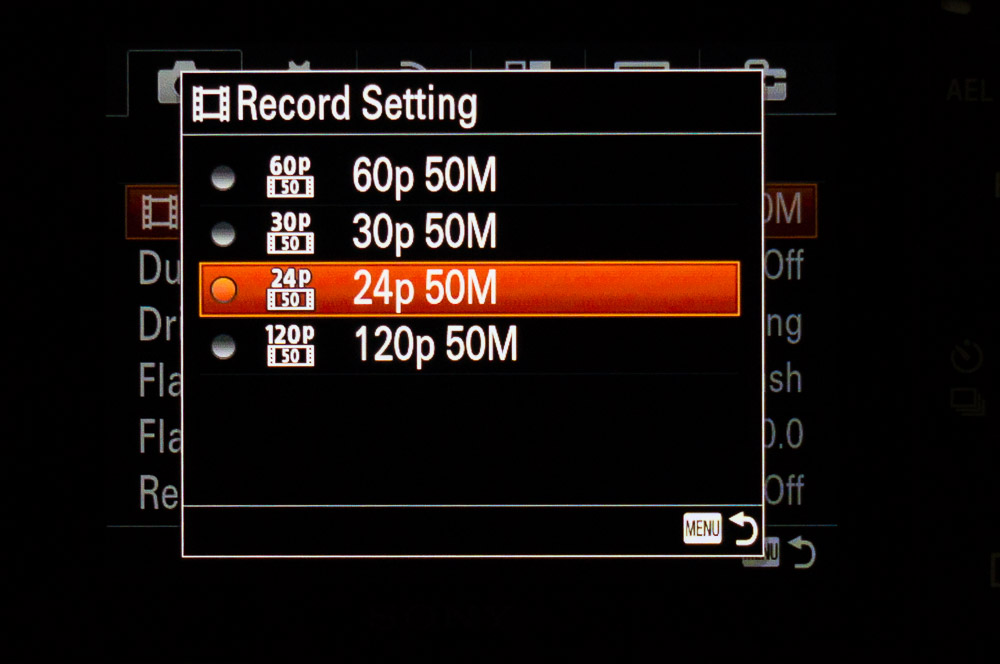
Sony A7s Menu – Record Settings
Sony A7s Menu – Picture Profile
Sony A7s Menu – Picture Profile # 7 ( PP7) = S-Log2
Sony A7s Menu – Picture Profile # 7 ( PP7) = S-Log2 – Settings
Closing Remarks:
I hope this information is helpful to those trying to figure out how to use the more advanced formats and profiles like XAVC S and S-Log2. on the Sony A7s. I’m currently learning myself, so I learned about the memory card format differences, and all the camera settings that need to be changed. The Picture Profiles area is really powerful and if you want the best quality possible and plan on doing post processing on your video, then the S-Log2 Gamma profile is worth checking out!
Once in post processing, taking advantage of the S-Log2 format is a matter of adding the proper adjustments which I am still learning for FinalCut Pro X. I see YouTube has a few videos for Adobe Premier though if you want to do a search.
Please let me know if you have any questions or if you have some experience with this advanced video format, feel free to share some knowledge 😉 Jay
Zeen is a next generation WordPress theme. It’s powerful, beautifully designed and comes with everything you need to engage your visitors and increase conversions.