Sony E-Mount Lens Guide Here >>

HDR Photography Tutorial – The Process Explained in Detail!!

In this 18+ minute How-To video tutorial, I will go over everything you need to know about HDR Photography while using the Sony Nex-7.

I will go over all the different methods you have for capturing higher dynamic range scenes including the built in AutoHDR Feature, Using Exposure compensation to get multiple exposures, and using Manual mode to capture multiple exposures.

If your not familiar with HDR Photography, be sure to check out this great Intro to HDR Photography Video Tutorial that explains all the concepts and theory you will need to know!!

To start the video off I’m going to go over Autohdr and how to set it up. Next, we will move on to using Aperture Priority mode and by manipulating the exposure compensation we will capture all the dynamic range in the given scene over a few frames. After that we will switch to Manual Mode and manipulate the shutter speed in order to get the exposure’s we want 😉 We will also discus briefly the few bracketing features that the Sony Nex-7 offers.

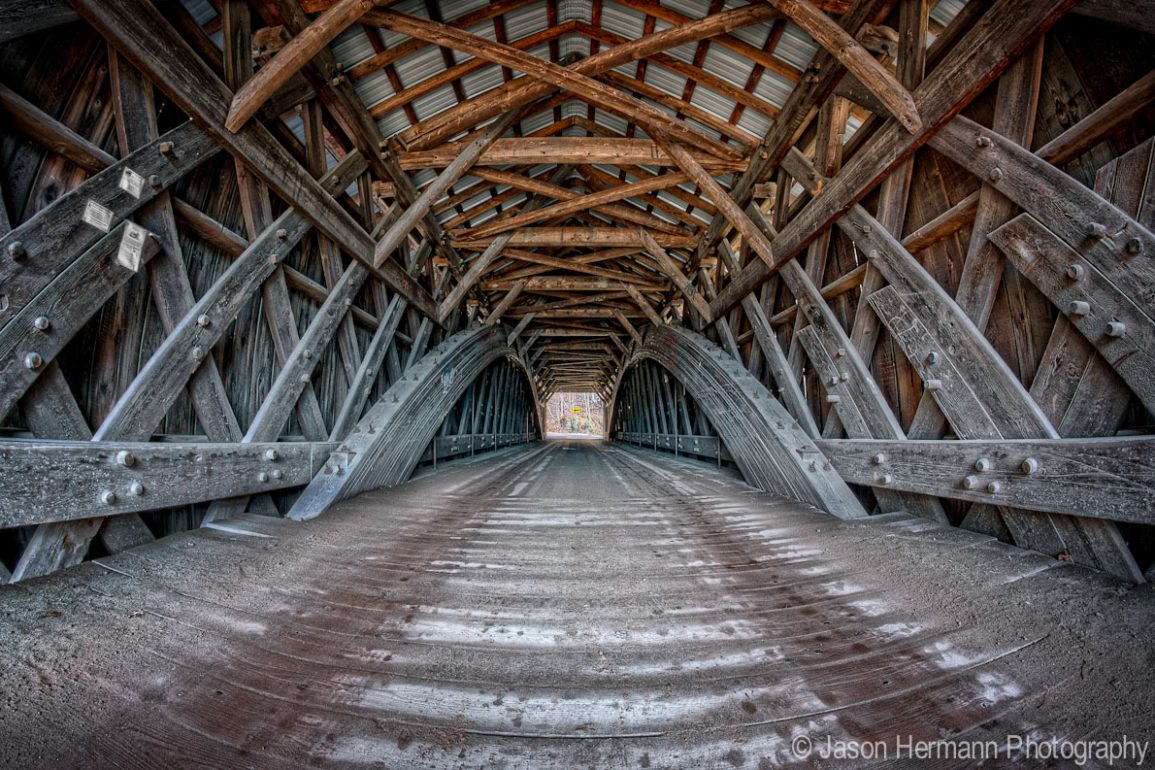
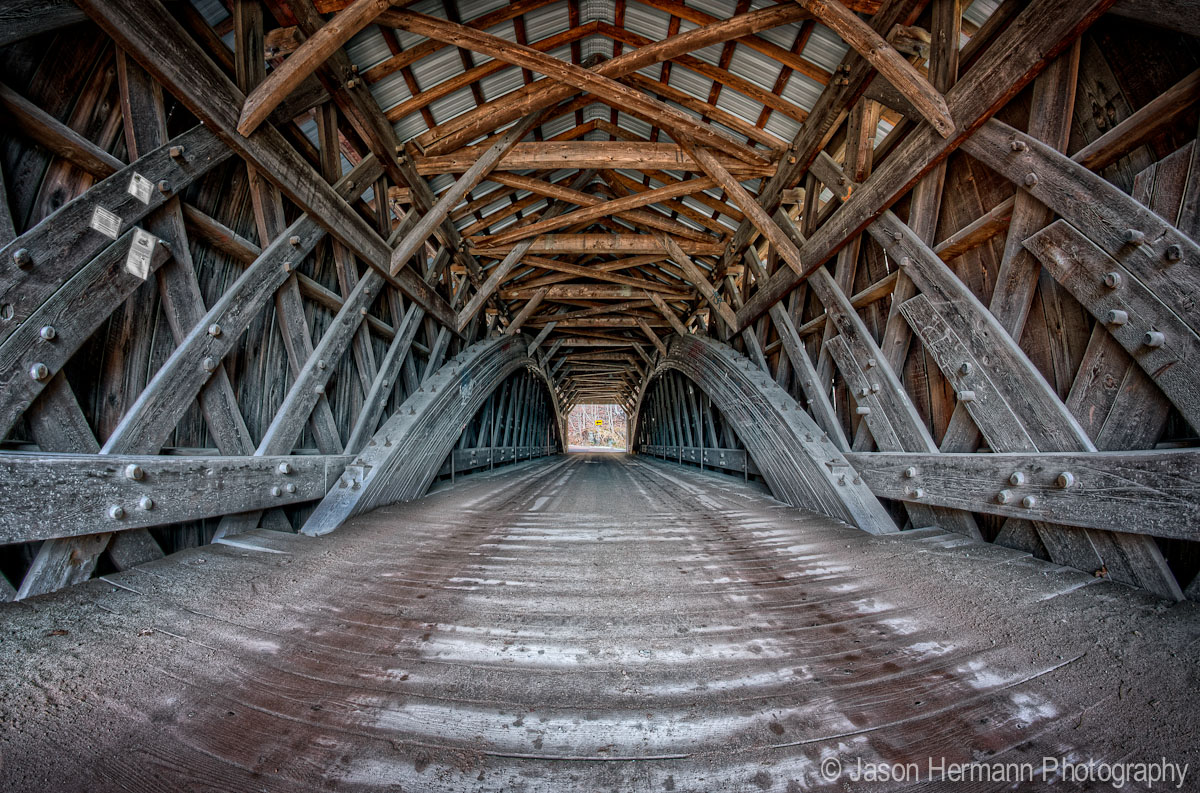
Click the pics for Full 1200px Photo

Rokinon 8mm and the Sony Nex-7 - HDR Photography
Rokinon 8mm and the Sony Nex-7 – HDR Photography
Nex-7 w/ Rokinon 8mm fisheye lens

Thanks for watching! Jay

  1. The video is great! Loved your bridge picture as well.
    One question – do you use a Rockinon A moount or Nikon mount with adapter, or it is the NEX version of the lens?

  2. I see that HDR is only for JPEG. Why is that? And what size print can be made off an HDR JPEG that would be sharp with detail?
    Thank you.

    1. Hello,
      AutoHDR is only in jpeg, because the camera is not able to process the Huge Raw files effectively. The Jpegs are much smaller and therefore it only takes the camera a few seconds to process. If it used the raw files, it would take incredible long and probably not look as good in my opinion as it’s an AutoFeature.
      Your best bet is to shoot raw and take separate exposure’s manually and then process the raw files for your HDR Composite. That will yield the sharpest and best quality consistently. The AutoHDR does work well, but I don’t think I would be printing anything much larger than 8xq10, 11×14. I am an HDR Pixel peeper though so the small flaws bother me on prints…..
      I hope that helps,
      Jay

  3. Hi,
    Awesome blog you have here, really helpful. I have a NEX 7, even after updating my firmware, I cant actually am able to change get the exposure setting options for Auto bracketing. Is there something I am missing. 😉
    Cheers
    GK

    1. Hello Gitesh,
      Thank you for the comments and question!! When you go into the bracket mode a little Option Button should pop up by the lower right corner of the screen. This corresponds to soft key B I believe. Going from memory here 😉 Once you press the options button you can change your bracket settings or EV spread.
      Did that help you out??
      Jay

  4. Great video. I came across this while searching fro a remote trigger for my Sony A55 to do HDR
    I have bee shooting HDR for over a year now and now feel the best way to shoot it is manually. I like 5 shots, but would like to get it down to three. I have even had good luck taking one and manually adjusting the exposure.
    One thing you did not mention is that is that in AUTO HDR you can change the the EV to 6.
    Question? What do you metering mode do you use and what do you meter on to get you initial exposure starting point. I shoot virtual tours, al lot of interiors with windows.

    1. Hi Richard,
      Thanks for the comments 🙂
      You want to use average metering mode as a starting point and then look at the histogram to see how much dynamic range you are missing with a single normal exposure. You can then adjust the exposure comp to see what you need for the shadows and highlights. At that point you should know exactly what you need. So switch to manual mode and take the necessary exposures you need for the scene. Possible 3,4,5, or even 6 might be needed depending on the windows and interior brightness.
      That will get you the best results in my opinion with the Nex-7. The Auto HDR mode works great, but it’s not good enough in my opinion for commercial work like your doing. You might get a few good frames here and there, but for a consistent high quality output, I would recommend the manual way.
      I also have several tutorials on processing HDR files in great detail if your interested!!
      http://sonyalphalab.com/category/tutorials/photography/hdr-photography/
      And more on the Forum Here:
      http://sonyalphalab.com/forums/showthread.php/167-Photomatix-Pro-Video-Tutorials!!-Five-Part-Series-Processing-Several-HDR-Files!!
      Thanks again for the comments and please feel free to ask any questions if you have them in the future!!
      Jay

  5. I have the nex5 and the 16mm lens with wide angle and superwide angle convertors and use it for real estate photography. However, the blown out windows and somewhat small auxiliary flash do not allow me to balance indoor and outdoor. Thus I end up shooting at dusk. I am considering buying a nex7 and a larger flash. Is it possible to do hdr photography using a flash?
    Thanks

    1. Hi Rich,
      Yes you can do that, but you need to do it manually. A flash will also work, but can be hard to balance when using HDR blended software. It really depends on the light and dynamic range in the room, as to what is the best method of capture. Often HDR is easier than using a flash. Sometimes a flash is required to light certain areas of a room though.
      I hope that helps,
      Jay

Leave a Reply