
In this HDR Photography Tutorial using the Sony Nex-6, I go over the settings used on camera, and then use Lightroom, and Photomatix, to process the raw files. Further editing is then done using various programs and techniques.
What is HDR Photography?? If that thought went through your mind, Please check out this HDR Introductory Video Tutorial I put together. Then come back and continue reading as it make a lot more sense 😉
In a nut shell what HDR Photography is exactly is simple the blending of multiple exposure’s at different EV values of the same exact scene. Usually tri-pod is used. The one exposure for the Highlights, one for the Shadows, and one Normal exposure will usually do the job for most scenes. Then with software such as Photomatix you can blend the three differently exposured images and create a HDR Composite image.
How to set the Nex-6 for HDR Photography?
There are a number of ways to take multiple exposures for the purposes for HDR Photography, but on the Nex-6 I usually use the exposure compensation wheel while in Aperture priority mode. The aperture should remain constant for your series of exposure’s, so A mode on the Nex-6 is a great place to start. Next you have a few options at your disposal.
- Auto HDR – Not the greatest quality do to jpeg compression and on camera processing. Great for quick shots and can yeild excellent results in the right conditions. You can choose your EV spread as well by hitting the option button which is the lower soft key. 4EV and 6EV is what I usually use.
- Bracket Feature (BRK C) Brackets are great feature that take takes the three varying exposure images for you in a continuous fashion. Bang bang bang. When then spread far enough to cover the dynamic range in the scene. I personally like to shoot -2, 0, +2, and the Nex-6 has many options!! It has .3ev, .7ev, 1ev, 2ev, and 3ev spreads. At a 2ev spread, which is what I used, the Nex-6 will take a photo at -2ev to exposure for the highlights in the scene, then another exposure at 0ev (the current settings), lastley it will take a +2ev exposure which will hopefully capture all the shadow detail.
- Exposure Comp – Another way to go is to simple use your exposure compensation and take a -2EV shot fallowed by a 0ev, the a +2. This method is slower than the bracket feature, but if using a rock solid tri-pod and your subject is still, it’s perfectly fine to use.
- Manual Mode – Yet another way to go is by using manual mode. You can then set your aperture to whatever you want, and then take as many frames as you want to get all the exposure information. You just adjust the shutter speed to do this which is exactly what the exposure comp method is doing in A mode btw;)
- what if you need more that 3 exposures? Then you can use the exposure compensation to swing your bracket spread 2ev each way. 6 exposure’s total. Manual mode is also a great way to get a lot of 1ev spread exposure’s for example. You can simple change the shutter one stop at a time and get all the info across as many frames as necessary.
- Shoot Raw – Raw files has the most color, shadow, and highlight detail available and make for much better HDR Photographs if you plan on editing thoroughly.
- Use Low ISO – I like to use ISO 100 whenever possible for HDR’s because the noise will actually combined in a lot of cases in the HDR composite image. This can make for extra post processing work and loss of detail. Lower ISO is the way to go!!
- Tri-pod – Critical to sharp perfectly aligned HDR Photos!!
As I said above, I used the Bracket feature at 2ev and a tri-pod for my NEX-6 HDR Photographs below!! So , in other words I used three exposures for each HDR with an EV spread of -2,0,+2.
Preparing Nex- 6 Raw Files for HDR Processing
So you import the raw files to your raw editor of choice and then what??
What I like to do is apply the basic lens profile corrections, sharpen slightly, and sometimes crop one of the raw files in the series of exposures. I then sync the three exposure’s so all the adjustments I made on the first will be copied to the other two. Now I have three HDR prepped raw files all synced with the same settings!!
Note: It is also important to note that I am using a Mac, so some of the options are going to be slightly different in windows. All basically the same though for the most part, nothing crazy different.
Click the pics for a large 1200px version!!
Processing the Raw Files
Next, I needed to edit the raw files in my HDR Processing program of choice. I personally like to use Photomatix Pro, but Photoshop HDR Pro works great, as does the HDR Efex Pro from the Nik Software company. There are also other open source free programs that work pretty good, but I have not had the time to experiment with any. Google is your friend though so don’t hesitate to do some searches!
Photomatix Pro Processing
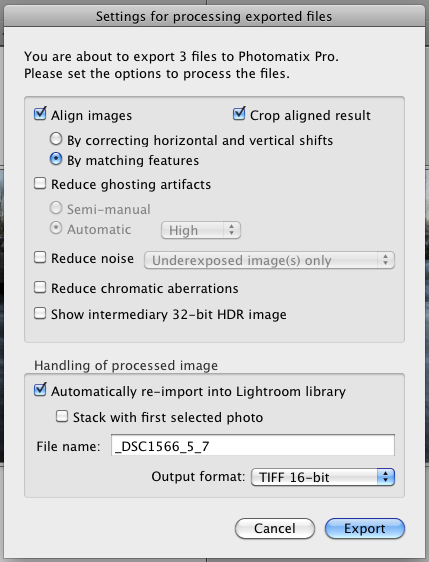
To process the raw files in Photomatix Pro from Lightroom, all you have to do is select the files you want to edit and then Right Click > Export > Photomatix Pro
You are then presented with this Settings for processing exported files window below. Note my settings for this particular HDR, but be sure to experiment with the other options as they do work depending on the scene. I also have more detailed tutorials on photomatix that explain these settings in depth over here: Photomatix Tutorials >>
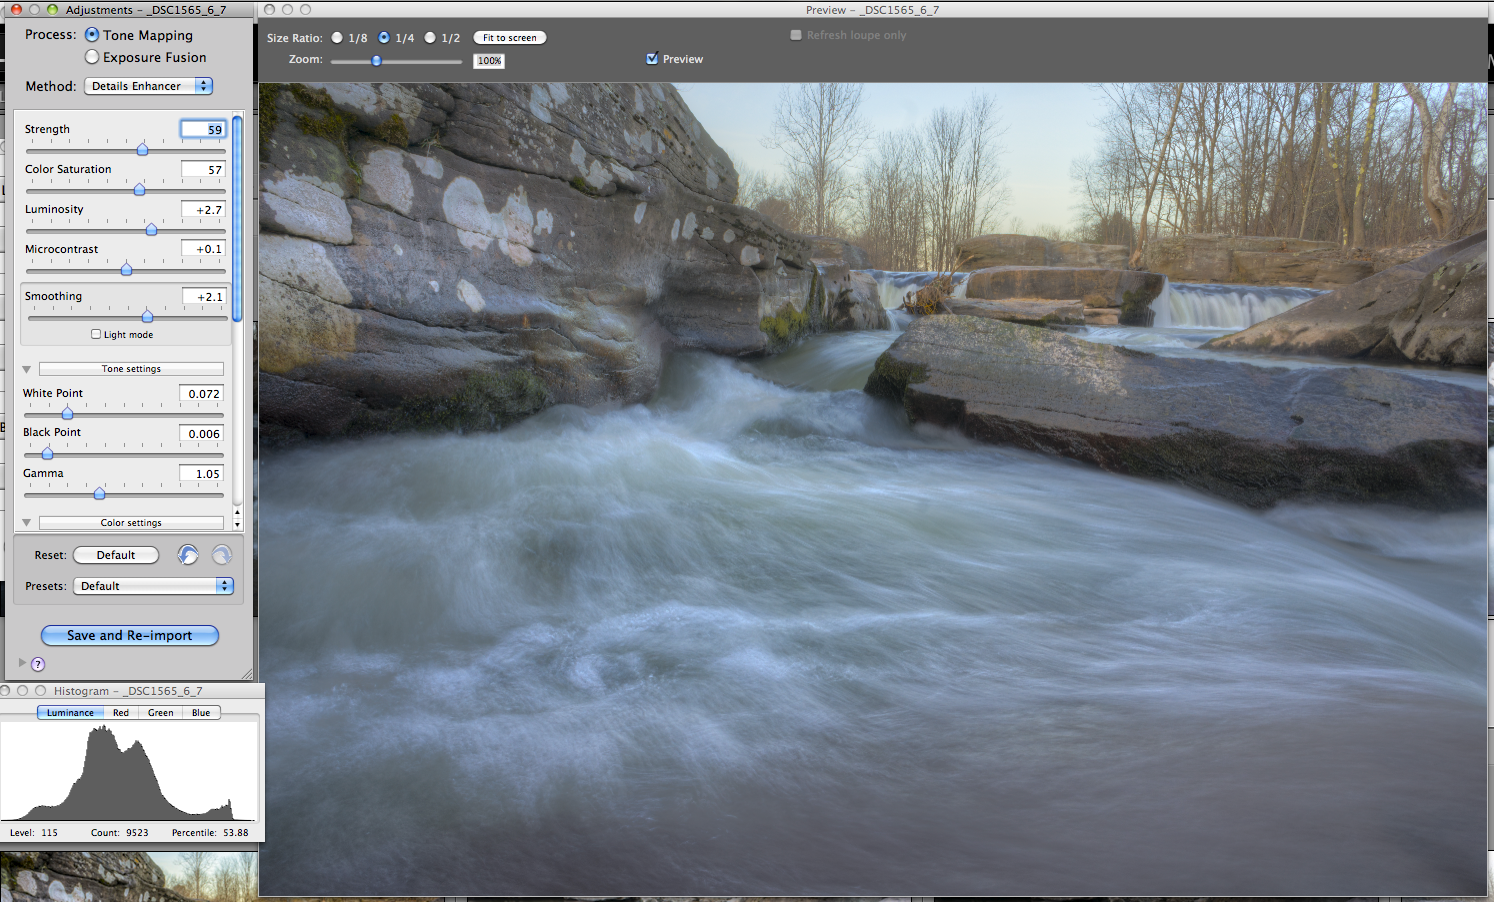
After setting your options as needed and clicking Export, you are then presented with Photomatix pro main interface. It’s quite impressive with lots of presets and other options to help you get going in different processing directions. I personally like to use the Enhancer Default preset in the Tone Mapping mode as seen below with all my settings for this HDR Composite.
Click the pics for a large 1200px version!!
Back In Lightroom
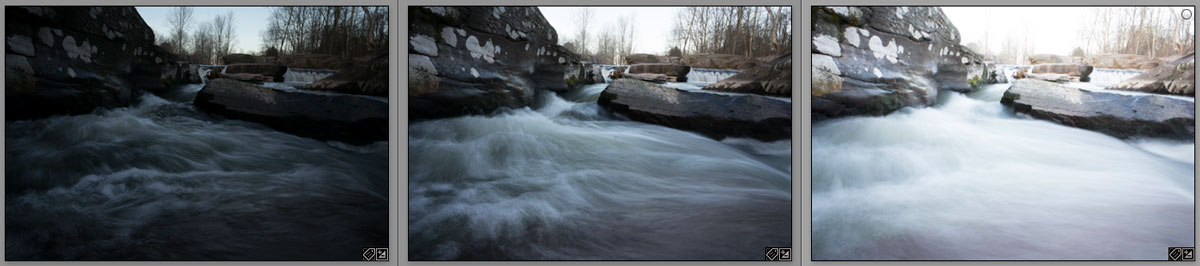
Here is what my HDR Composite looked like after it Re-imorted to Lightroom. Basically a Raw HDR Composite at this point with further enhancing needed to correct contrast, sharpness and color!!

Lightroom Adjustments
At this point you really can go nuts editing, because you have a 16-bit tiff file to work with. Further processing with Photoshop, the Nik Filters, or whatever program you chose to use, can greatly enhance the final results.
So what did I do?
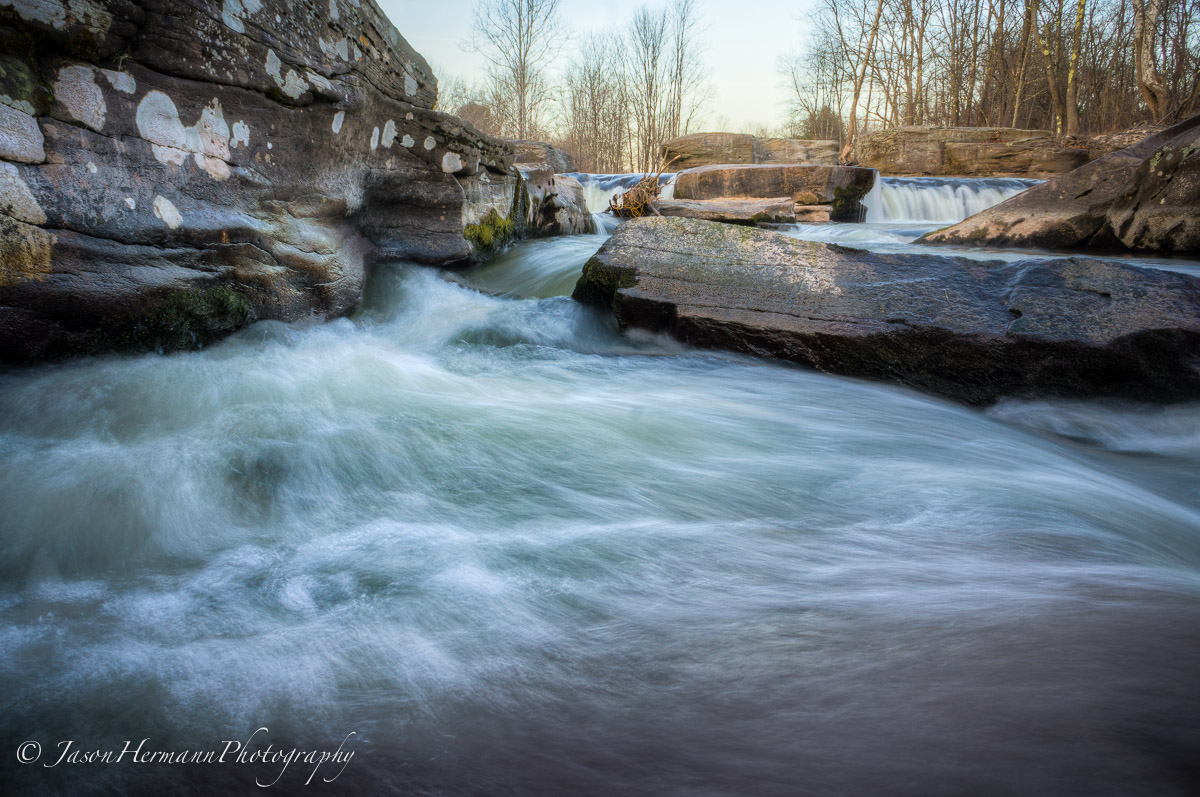
First thing I did was adjust the white balance, color, and contrast using the various sliders and controls in the Lightroom Develop Module.
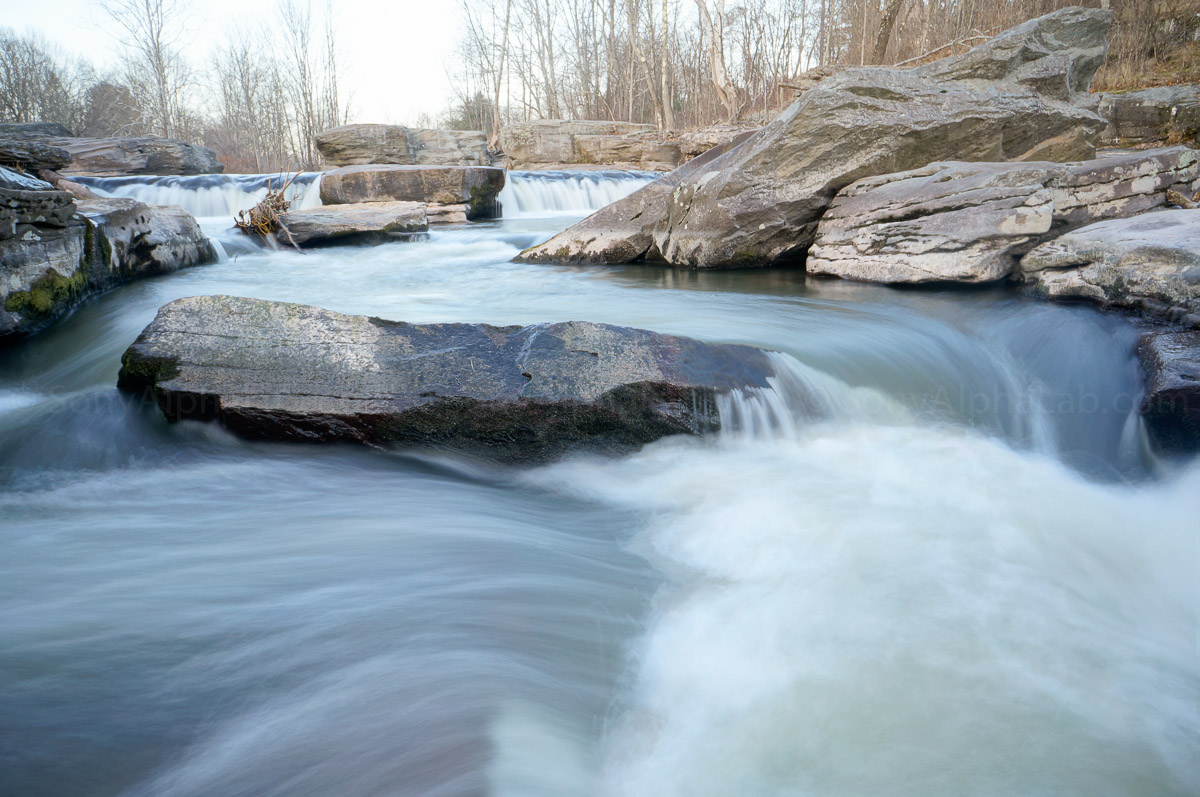
Here is the resulting image:
Click the pics for a large 1200px version!!
More Editing?
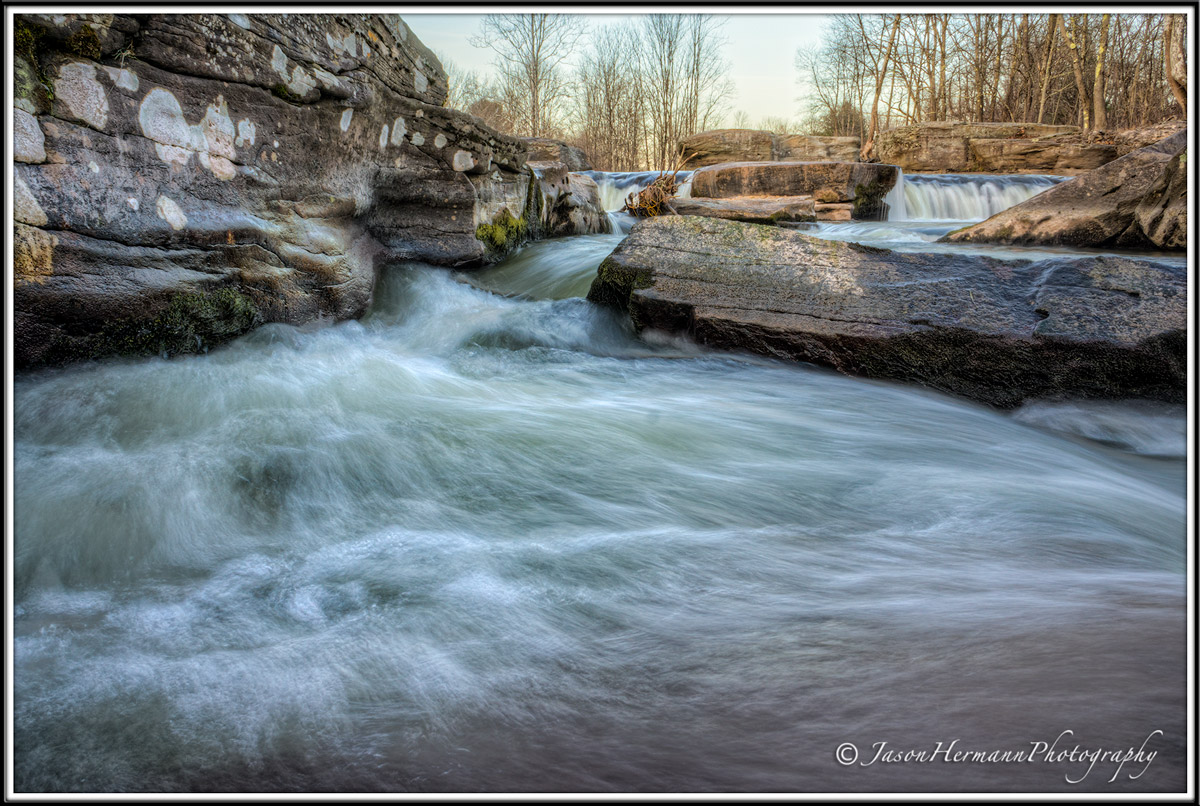
Next I went into the Nik Filters then Photoshop CS6 and played for a bit. Here is the final result and total time was about 15-20 minutes. be to sure look at the full 1200px versions of these files so you can see the difference the additional editing made. I could still play with this photo for a while before an actual print. The colors could still be tweaked in the water more for example, selective sharpening and contrast, dodging and burning to add more dimension and depth, ect..
Click the pics for a large 1200px version!!
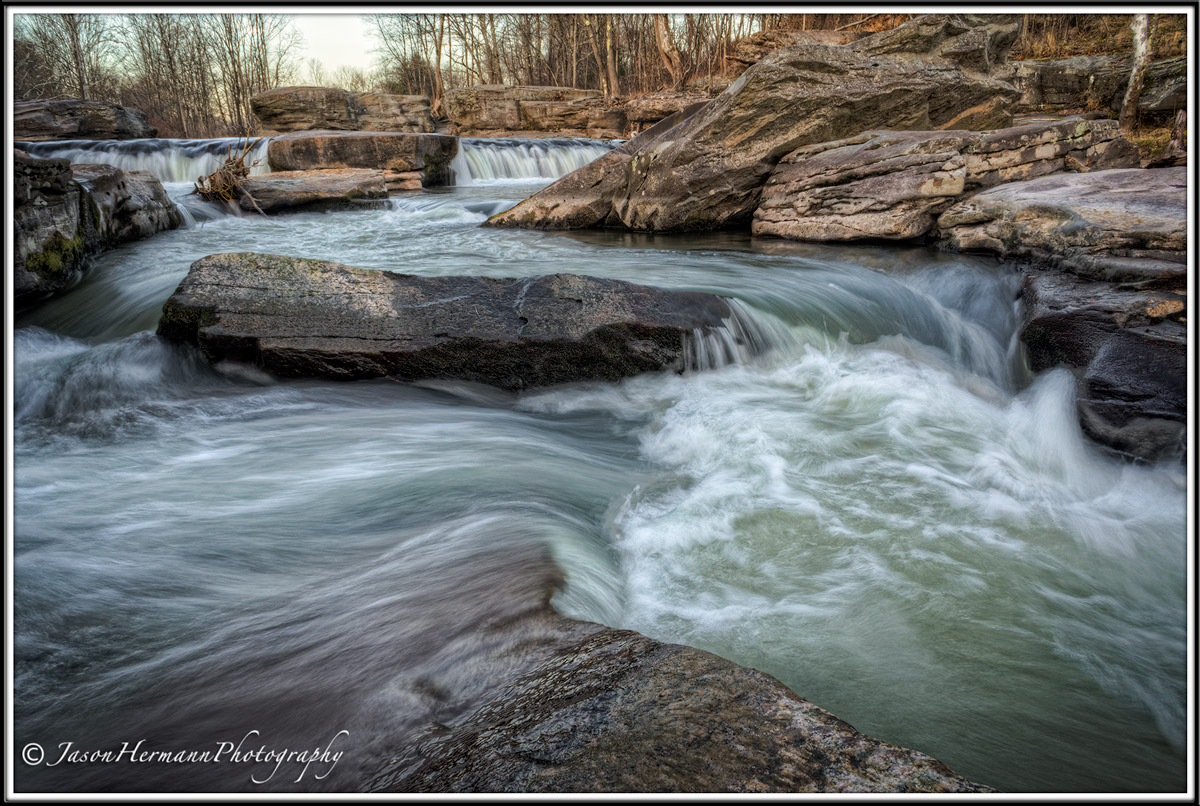
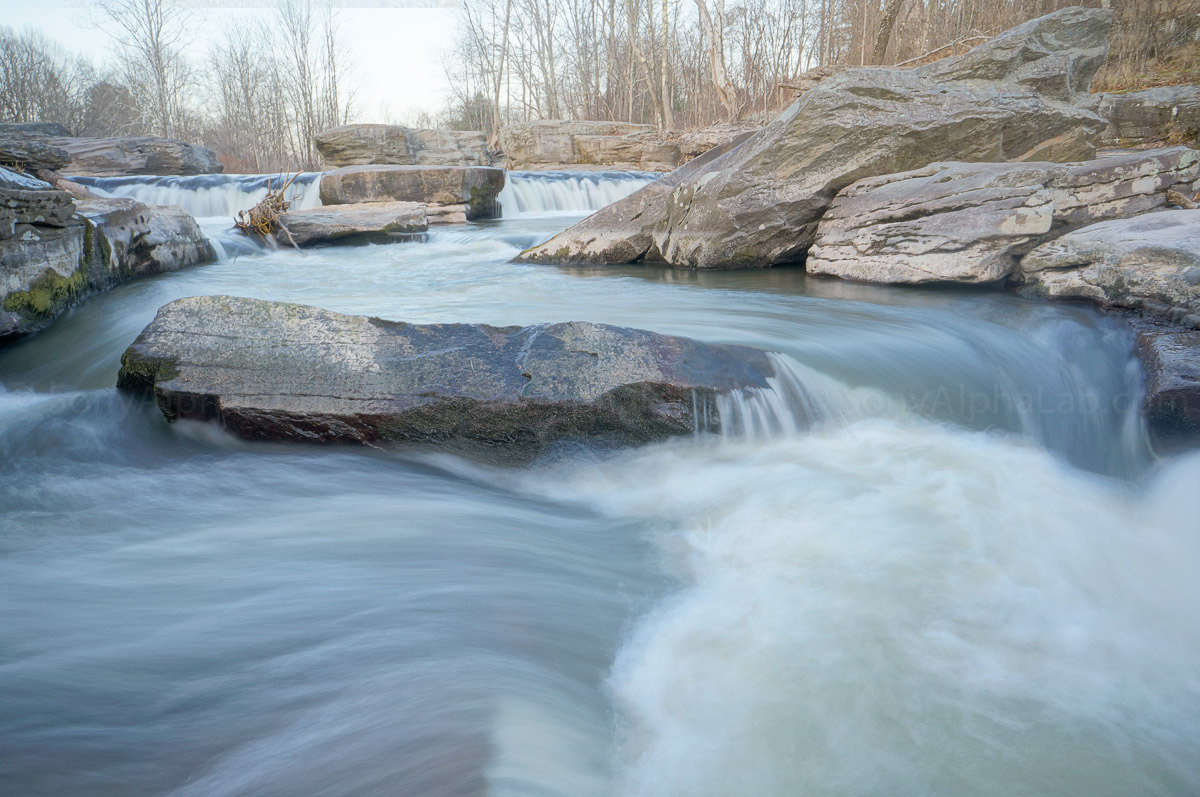
A Few More Nex-6 HDR Photography Samples
I took this photo the same exact way at a slightly higher point of view.
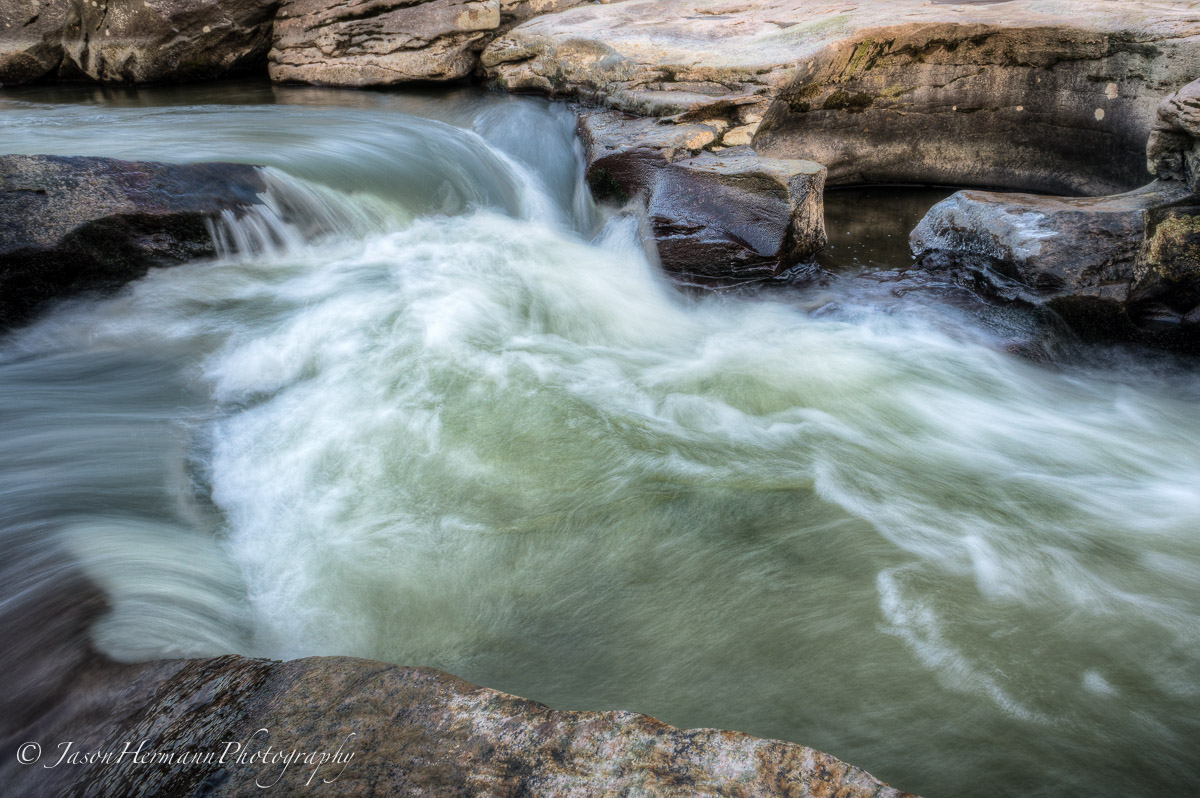
Wonder What Auto HDR Would Look Like??
Well it just so happens I took Auto HDR pics as well using an EV setting of 4 and then 6. Check them out below:
The Auto HDR does a decent job, and with additional editing could be enhanced a little better. I also could have tweaked the camera settings more to get a better result, such as white balance and aperture, or exposure comp to swing the result one way or another. It’s not film, so don’t hesitate to change settings and try again!!
Closing Remarks:
The Sony Nex-6 with the 16mm f/2.8 E-Mount lens is capable of getting great quality HDR Photographs with a little processing and the correct settings of choice. Auto HDR does a decent job and is very fast for in camera on the spot results.
I hope that you all got something out of this Nex-6 HDR Photography Tutorial and please fell free to ask questions below. I’m happy to help explain in more detail anything I did ect..
Jay


