I recently purchased the Minolta MC 58mm f/1.4 Lens on Ebay, and in this article I’m going to show you some high res sample photos using the Sony Nex-6 and RainbowImaging lens Adapter!! I’m loving these old school lenses for there build quality, sharpness, and overall design, but most of all, Cost!! I got this lens for $47.00 US.
The old school Minolta lenses work so well on the Nex camera system it’s as if they were designed for them. The other Minolta 50mm f/2 lens, I reviewed the other day (Click Here), is a MD version and much newer in relation to the MC version I’m testing in this article. The MC version weighs a lit more because it’s pretty much an all metal design.
Updated Lens now fixed, see below: Unfortunately the lens that I got does not have a working aperture blade mechanism, so it’s stuck wide-open at f/1.4. Oh Well. Ebay is a bit of a gamble, but I am still happy with the purchase as it did say in the description f/1.4 only. I read it in the description, but as I was telling you in the last Minolta lens article, is very easy to skim over. It’s very important you go over the descriptions with a fine tooth comb!! I only planned on using the lens mostly wide open anyway, so I really don’t care to much.
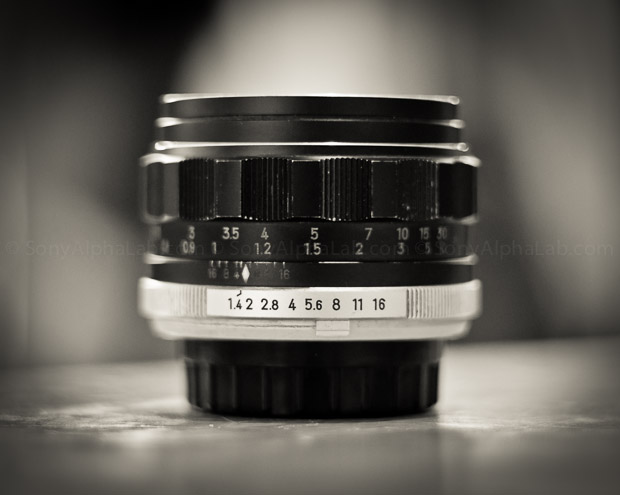
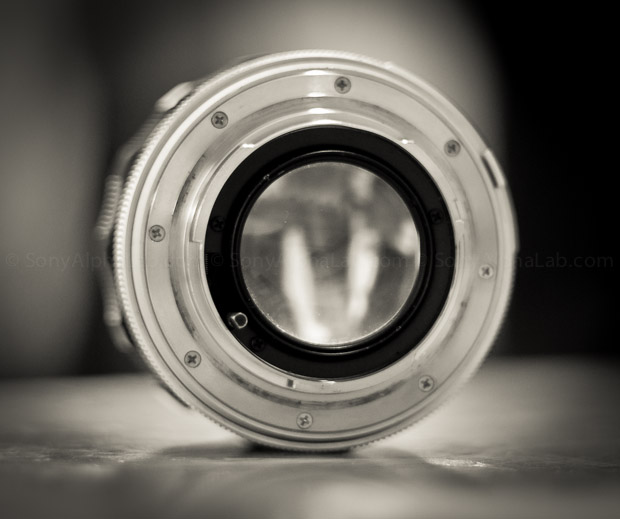
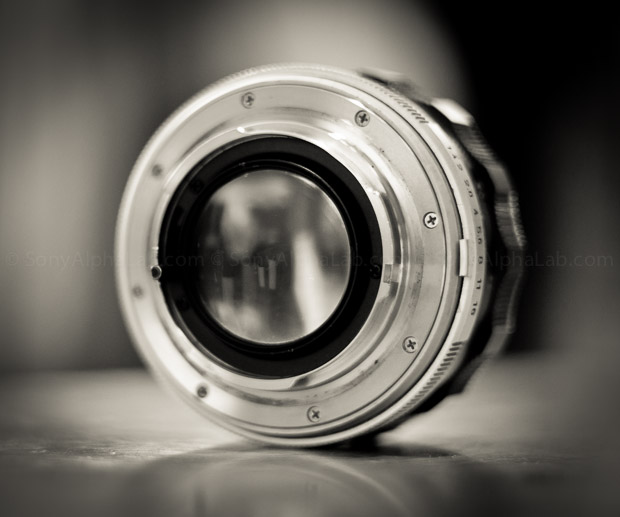
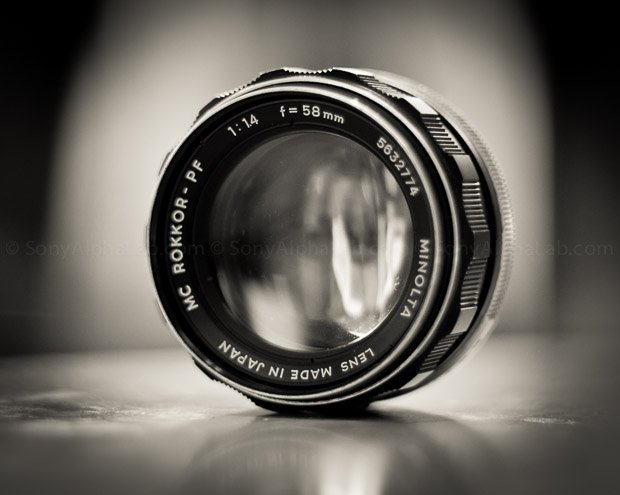
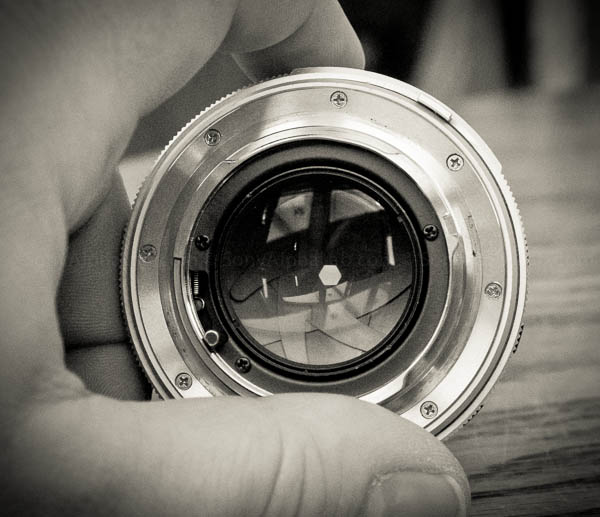
Update: Lens Pics!
I actually took these photos of the Minolta MC Rokkor – PF 58mm f/1.4 Lens last night on the kitchen counter with my Minolta MC Rokkor PG 50mm f/1.4 lens 🙂 Awesome lens with a fully function aperture diaphragm!!
Reader Instructions on How to Fix Lens!!
A reader and friend of SonyAlphaLab (Arne) was kind enough to send detailed instructions on how to to take the lens apart and clean the greasy aperture diaphragm, which is probably the issue with my lens. Check this out if your curious, and please feel free to ad info and or resources on the topic as I would like to try and fix the lens myself!
I have never taken a lens apart, but after reading these instruction it seems totally doable 🙂
Hello Jay!
Not reading all the writing in eBay listings can lead to some surprises! The Minolta Rokkor MC 58 mm 1,4 you bought do you believe the aperture isn’t working because of oil/grease one the aperture blades? If so it is quite easy to clean! I presume you already know everything there is to know about taking a lens apart, cleaning the diaphragm and putting the lens back together. But in case you are not to sure how to clean the aperture please allow me to guide you.
Between the words ‘Minolta’ and ‘lens’ on the ring between the filter ring and the 1st lens element, there is a little indentation. And between the words ‘Rokkor – PF’ and ‘1:1,4’ there is another little indentation. Use those two indentations to twist off that ring. Underneath you will find 3 screws. Unscrew them and lift off the filter ring. Now you will see 4 screws near the edge of the front lens element, and 3 screws at the outer rim. (Don’t touch those 3 screws, they are for adjusting focus.) Focus the lens to infinity. Make a scratch mark/line besides one of the 4 screws and also down on the metal where the 3 screws are. (To align when you are putting the lens back together.) Unscrew the 4 screws and remove them. Grasp with your finger tips the metal ring surrounding the edge of the 1st lens element and turn the lens body/barrel so the lens mount faces upwards. Now the whole lens element unit will “fall” out of the lens body/barrel/tube and into your fingers.
On the rear end of the lens element unit you will find a ca. 15 millimeter long L-shaped metal lever. (Something like this: LLLLLL). Inside the lens body/barrel/tube you will see a narrow gap in a metal piece that is attached from the inside to the aperture ring and follows when the aperture ring is turned. (The metal piece has a somewhat rounded end which is about 4 millimeter in diameter. The narrow gap in the rounded end is about 0,5 millimeter wide. The L-shaped metal lever is supposed to fit into that narrow gap. More on this later)
Now you need to twist off the front lens group and the rear lens group to get to the diaphragm. Just beneath the metal ring surrounding the edge of the 1st lens element there is a “ledge”. Hold firmly under that ledge with one hand and screw loose the front lens group with the other. (The metal ring surrounding the edge of the 1st lens element is all you’ve got to hold on to. Wearing a pair of leather gloves may add some torque if the lens group sits tight.) Twist also off the rear lens group.
Now you have got the diaphragm ‘house’ in your hand. Soak it with liquid dish washer and open and close the diaphragm blades and turn the regulators (you will know what I mean when you see them…) back and forth (gentle!) several times. Rinse the diaphragm ‘house’ thoroughly under running warm water when you are sure you have got rid of ALL the oil/grease from the diaphragm blades. Use some soft toilet paper to dry the diaphragm ‘house’. Don’t ‘rub’ the paper, just ‘tap’ it. Don’t leave any water drops on the diaphragm blades as they will leave stains when they dry. Put the diaphragm ‘house’ somewhere it can dry completely. (I have central heating and I usually leave (metal) things that need to dry quickly on top of the radiator for some minutes.
When you are absolutely sure that the diaphragm ‘house’ is completely dry and the diaphragm blades are moving freely and ‘snappy’ you can screw back both the front lens group and the rear lens group. Make sure the focus ring is still at infinity, set the aperture ring to 1,4 and close the diaphragm on the lens element unit. Clean the surface of the rear lens before you grasp the metal ring surrounding the edge of the 1st lens element like you did earlier and insert the whole lens element unit into the lens body/barrel/tube. By looking through the lens mount you will easier make the L-shaped metal fit into the narrow gap, mentioned earlier.
With the lens element unit back in place inside the lens body/barrel/tube, and the rear lens cap on, align the scratch markings you made and loosely tighten one screw of the 4. Now turn the aperture ring and see if the diaphragm opens and closes, set the aperture to 11 or 16 and see if the stop down lever works. If so tighten the remaining 3 screws of those 4. Clean the surface of the front lens and put back the filter ring and tighten the 3 screws. Screw back in place the ring with the two indentations that sits between the filter thread and the front lens element.
Hello Jay!
How are you doing? Do you still look at your MC 58 mm 1,4 with a friendly glimpse in your eyes?
A suitable tool to screw out the ring between the filter thread and lens element (the ftale-ring), may be one of these:
Range Finder Opener Type S Camera repair tool Made in Japan
http://www.ebay.com/itm/271145742459
or
Professional DSLR Lens Spanner Wrench Tool For Camera Lens Repair open 10~100mm
http://www.ebay.com/itm/271093795275
and for the screws in the lens, may be something like these:
7PC PRECISION SCREWDRIVER SET MAGNETIC TIPS NEIKO
http://www.ebay.com/itm/7PC-PRECISION-SCREWDRIVER-SET-MAGNETIC-TIPS-NEIKO-/300633275358
A magnetic tip makes it easier to insert the screws into their places when putting the lens back together. The size of the screw driver handles has some importance. The handles need to be of some size to ensure you get a firm grip and enough torque to loosen the screw when screwing the screws out. (Tiny screw drivers with tiny handles can be a certain way to ruin the screw heads.)
A drop of nail polish underneath the screw head just as it is being fastened, will prevent the screw from loosening by itself. Choose any nail polish colour you like, a little bottle will last you for years. (A clear / transparent nail polish does look better on the lens than a coloured one.) During its use the nail polish may get quite thick inside the bottle. By adding a few drops of acetone and shaking the bottle, the nail polish gets nice and “playable” again.
You can be glad your MC 58 mm 1,4 isn’t a Canon FD/FDn 50 mm 1,4. Taking apart a FD/FDn lens is quite a challenge! Well, taking it apart is much much easier than putting it back together, again. No wonder Canon choose a different mount for their EF lenses.
Kind regards
Arne.
Fallow-Up Question for Arne:
[quote]I just read this over twice Arne and it sounds like a serious task?? You explained it extremely well and I believe I was able to visualize what your saying. How long would you say this whole process would take me doing it for the first time? Any other thoughts on this being my first time taking aliens apart?? Some cautions perhaps? touching the glass seems like it will be an issue putting it back together?
I really want to try fixing it 🙂 Thank you so much, as I know how long it can take to write a mini tutorial like you did here, and I greatly appreciate it!!
Best,
Jay
Fallow-up Answer from Arne with even more detailed instructions!!
Hello Jay!
Have you ever been standing in front of a piano with a piece of music in your hand, knowing nothing about piano playing except only which key on the piano that “belongs” to which note in the music paper, and trying to play the the whole piece of music in a way that makes it possible for listeners to recognize the melody?
If so I believe I know how you must feel in front of your Rokkor MC 58mm.
The only tools you’ll need is a screwdriver (+ may be a pair of leather gloves?) and a suitable tool to screw out the ring between the filter thread and lens element. (Ftale-ring. I don’t know what else to call it.) By looking at the (8) screws in the lens mount you will see which kind of screwdriver you will need. Rokkor lenses made before 1968 – 1969 had slotted screws. Lenses made later had cross-head screws. I believe your MC 58 mm has slotted screws?
You can get rid of eventually dust-, sand- and other particles from the filter thread by brushing with a toothbrush. Hopefully your filter thread is without any dents or other damages? It is easier to screw out the ftale-ring when the filter threads are clean and undamaged.
The easiest way to screw out the ftale-ring is by using an arch formed piece of metal that reaches between, and fits into, the two indentations in the ftale-ring.
As I don’t have such a tool I insert a small screwdriver into one of the indentations and push the screwdriver carefully with my left hand thumb while holding the screwdriver in place with my right hand, alternating between the two indentations. (Be cautious! You don’t want the screwdriver to slip and scratch your lens surface!)
With the ftale-ring out of the way you are past one of the biggest hindrances in taking apart the lens.
Both the front lens group and the rear lens group are fitted inside their own metal tube “cartridges”. None of the lens elements can fall out.
To clean the lens surface I use a pad of clean cotton scarcely moistened with some isopropanol. After that I breathe on the lens and quickly wipe with clean cotton before the condensation on the lens surface dries. I do this a couple of times (breathe on the lens), using a new pad of cotton each time. Then I use some compressed air to blow away any cotton lint/dust on the lens surface. (Have you got any other 50 mm 1,4 or 1,2 lens? You can use that as a loupe by looking through the 50mm lens from the mount end and the aperture wide open. Makes it easier to discover any dust particles on the lens surface.)
The part that takes the longest time, when cleaning oil from the aperture blades, is drying the diaphragm ‘house’ after cleaning. To avoid rust (and maybe fungus) the diaphragm ‘house’ must be absolutely dry before screwing the rear and front lens groups back onto it.
Taking the MC 58 mm apart, cleaning and drying the diaphragm and putting the lens back together will take not more than 1 hour, I think. When you know what you are doing…
Being your first time taking this lens apart I wouldn’t care so much about how long time you will need. Be patient with yourself. When you are finished with it everybody can see what kind of work you have done. Nobody can see how long time you spent.
I am pretty sure you will manage this, Jay. I believe you are not afraid of doing the job, you are just “afraid” of beginning. Think of it like this, something like Neil Armstrong could have said: One small step for man, one giant leap for Jay!
Now I think I can take it apart!!
I took the lens apart per Arnes’s excellent instructions and everything went to plan except I did not dry the aperture diaphragm enough or it needed to be cleaned better because it was not snapping back to place per the instructions!! So I asked Arne for some advice??
Fallow-Up Question for Arne:
Hello,
I actually took the lens completely part per your excellent instructions and cleaned the aperture diaphragm and dried it completely. It’s not as snappy though as it was when wet under water? Is it supposed to spring back into close on it’s own??
Thanks you!!
Jay
Wouldn’t you know Arne email me back almost immediately with tons more insight and instruction!! This world is getting smaller by the day I swear 🙂
Fallow-up Answer from Arne with even more detailed instructions!!
Hello Jay!
When the diaphragm ‘house’ is separated from the rest of the the lens, you will see a brass ring around the rear end. Under that brass ring there is an arch shaped piece of stamped metal. Onto that stamped metal, at the end of it, there is a small rod standing up. (About 1 centimeter high and 2 millimeter i diameter). If you hold the diaphragm ‘house’ with the rear end pointing at you, and the rod at the 3 o’clock position, there should be a spring between the right end of the stamped metal and a small screw in the 12 o’clock position. The spring is “bending” over a bigger screw in the 2 o’clock position, approximately 2 o’clock.
The brass ring regulates how big the opening of the aperture blades get, (1,4 – 16).
When the little rod is moved down to a 4 o’clock position and then released the spring loaded arch metal forces the aperture blades to immediately close down from that opening to the smallest opening. If there is any hesitation in this movement, there may be oil/grease on either the aperture blades, between the arch shaped metal and the diaphragm ‘house, or between the two rings in the aperture mechanism and the aperture blades/ diaphragm ‘house. (There are two rings in the aperture mechanism, one fixed underneath the aperture blades and one that rotates above the aperture blades and is connected to the brass ring.)
Any “pollution” here will slow down the movement of the closing of the aperture blades. Are you sure the diaphragm ‘house’ is completely dry? A tiny drop of water is enough to slow down the aperture. (A hair dryer may come in handy…)
If the diaphragm ‘house’ is completely dry but still slow, there is still some oil/grease left somewhere in the diaphragm ‘house’, meaning I am afraid you will have to repeat the cleaning process. Soak the diaphragm ‘house in some liquid dish washer soap and move the brass ring and the arch shaped metal several times (be gentle, the liquid soap is quite “heavy” to move about inside the aperture mechanism. If the oil/grease is old and dry it may take some time for the soap to dissolve it. Rinse out the soap under warm running water and dry the diaphragm ‘house’. In a clean diaphragm ‘house’ the aperture blades will open and close almost without any friction and hesitation.
There is also a spring in the lens mount, is that moving fast and snappy as well? [/quote]
I just needed to re-clean the aperture diaphragm with dish-soap and dry it again really good. I don’t think I dried or cleaned it enough the first time!! I used a space heater to blow air on it as I opened and closed the aperture to insure everything was really dry. Sure enough it was snappy and the bladed were pulling closed like they are supposed to!!
I had to let Arne know as this was a really proud moment for me 😉 Not really but cooll how old stuff can still be worked on easily and actually fixed!!
Bragging to Arne of my Success 🙂
I did not dry the aperture diaphragm enough. I dried it really good and it was nice and snappy as you put it. put it back together cleaned the glass alone the way. Awesome fully function lens my friend and I really appreciate your help!! I’m going to post the rest of your tips on the Minolta article as well as update it with the results of the fixed lens per your instructions!!
Thanks again,
Jay
Arne’s Kind words
Congratulations Jay!
You made it! I am happy it worked out for you! I hope you will be pleased with the lens.
Knowing how to take apart a lens makes it a bit less risky to buy lenses from eBay…? (Minolta Rokkor lenses that is. I find Rokkor lenses more “intelligent” built and put together.)
I hope you’ll have a nice weekend!
Kind regards
Arne.
Lens repaired and working perfect!!
Thanks again Arne for this incredible instructions that are super accurate and made this job a very simple task. The total time was about 1.5 hours playing with Layla in between of course 😉 I could do it much faster next time though for sure. I was a bit nervous to be honest, but it wasn’t that bad at all. Un-screwing the first ring was a little hairy because i used a flat head screw driver and did not want to slip as I tried to rotate the ring off.
UN-screwing the front lens element set and the rear element set was probably the coolest part of the process for me, but it was a really fun little project and I recommend trying yourself if your somewhat handy.
Check out the Minolta MC 58mm f/1.4 lens now with the aperture at f/16!!
Minolta MC 58mm f/1.4 Lens – Sample Photos
All these photos Minolta MC 58mm f/1.4 Lens sample images were taken with the Sony Nex-6 and RaindowImaging MD to Nex Lens adapter shooting RAW for maximum quality and developing flexibility in Adobe Lightroom or Apple Aperture 😉
This first photo of Chubs I got extremely lucky and managed to capture a wink!! I did a little extra editing in Photoshop CS6 because I plan on printing the image 🙂 The wink is a rare to capture for Chubs!!
Be sure to Click the Photos for a nice large 1200px version!!
The rest of these Minolta MC 58mm f/1.4 Lens sample images are raw files with minor Lightroom 4 developing adjustments.
Feeling Lucky??
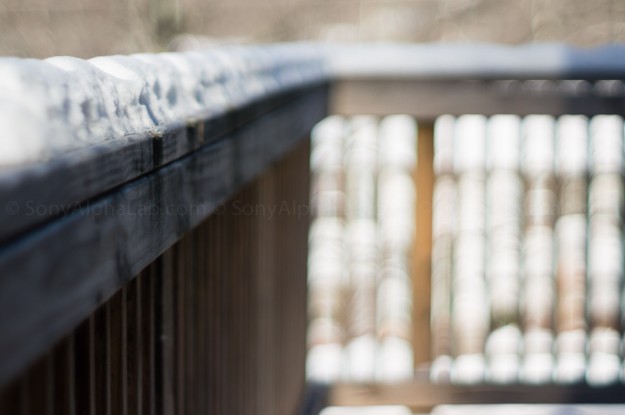
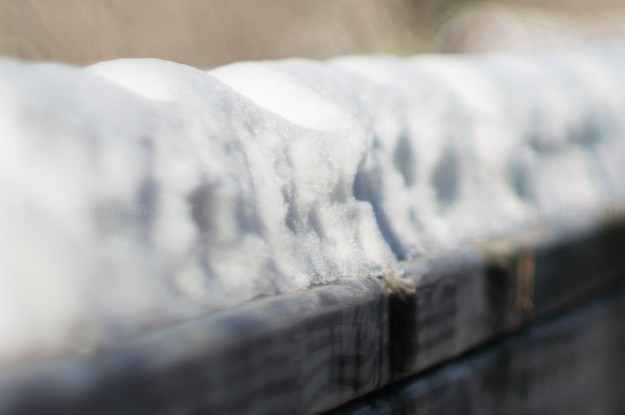
A few snapshots from outside.
Closing Remarks
Loving the Nex-6 and old school lenses big time and plan on getting more for sure. The Minolta MC 58mm f/1.4 Lens is great, even though it’s stuck wide open at f/1.4.
Thanks for checking out SonyAlphaLab, and please be sure to share your thoughts on the new category system below in the comments area. I always look forward to reading them, and you guys always have some great ideas!!
Thanks, Jay

