I love playing with the Aperture and using it creatively in my Photography, and in this Tutorial I explain Aperture in depth as it relates to Photography!!
You will also learn: How to use aperture to your advantage? When to use which aperture? What does stopping down mean? What does wide open mean? Why are those f/1.2 & f/1.4 lenses so expensive? What exactly is Depth of Field? What is a bokeh, and what causes it?
I put this tutorial together a while back for my old photography tutorial website JHPVideoTutorials.com, so you will see some watermarks reflecting that. Don’t worry it is still my photography etc..
Intro to Understanding Aperture
I decided I’m going to start this Aperture tutorial with an image I just took a few days ago at Soon’s Orchard in Orange County NY. I stopped there to pick-up a few of their absolutely amazing apple cider donuts and some apple cider to wash it down 🙂 As I was heading back to my truck stuffing my face with a nice warm fresh donut I noticed they had this huge garden of flowers I needed to check out closer. I knew right away that I was going to want to isolate the flowers from the background, and a high focal length lens plus a large aperture are great for these types of compositions. So I inhaled the donut and grabbed my gear. The garden was gorgeous and I took well over 100 shots. I knew these images would work great for an aperture tutorial 😉
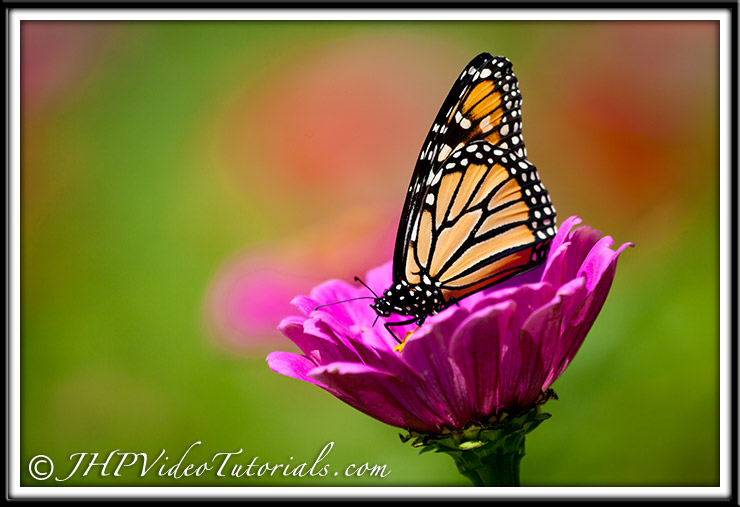
In the image below I really wanted to isolate the subject from the background and have that nice buttery bokeh for a backdrop. So I got as close to the butterfly as I could while still being able to focus and took the shot. I was about 2 meters away.
I used the Full Frame Canon 5D Mark II with the Canon EF 100-400mm f/4.5-5.6L IS USM lens @ 400mm, set to f/5.6 @ 1/1600sec, ISO 320. So the combination of the high focal length (400mm), being at the minimum focus distance, and the “wide open” Aperture created this composition.
ted to isolate the subject from the background and have that nice buttery bokeh for a backdrop. So I got as close to the butterfly as I could while still being able to focus and took the shot. I was about 2 meters away.
I used the Full Frame Canon 5D Mark II with the Canon EF 100-400mm f/4.5-5.6L IS USM lens @ 400mm, set to f/5.6 @ 1/1600sec, ISO 320. So the combination of the high focal length (400mm), being at the minimum focus distance, and the “wide open” Aperture created this composition.
The Aperture is the mechanism that controls the light flowing though your lens in increments known as f-stops. Basically the light travels through the lens like water through a pipe. The Aperture is the valve the can slow the flow of water, or in our case light down 😉
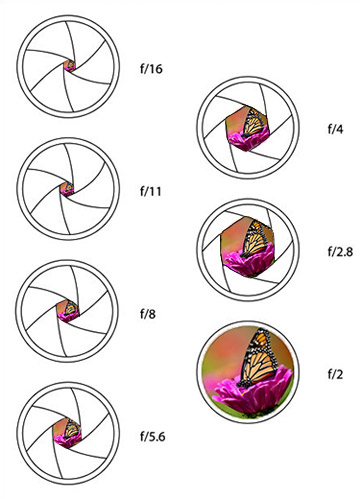
Check out the chart below and you will see what I mean!! f/16 is barely letting any water (light) through, and f/2 is pretty much “wide open”
What Are F-Stops??
Aperture settings increments are called f-stops and indicate the size of the aperture opening. Each f-stop lets in half as much light as the next larger opening and twice as much light as the next smaller opening.
The most common F-stops are shown to the left, but most cameras can be set to 1/2 stops, or even 1/3 stops these days so you have more flexibility and control. Which is nice 🙂
Now, on Sony DSLR’s there should be a shooting mode labeled A. That stands for aperture priority mode, and is by far the most popular shooting mode for the average photographer in my opinion. I personally use A most of the time unless I’m using studio lights or flash, then I move to manual mode. A mode is great, because if you adjust the dial on your camera to your preferred aperture, the shutter speed will adjust automatically for you. Depending on the ISO setting Auto vs manually set, that can also change automatically if you prefer.
A closer look at Aperture Priority Mode:
How does the Aperture Mechanism Work?
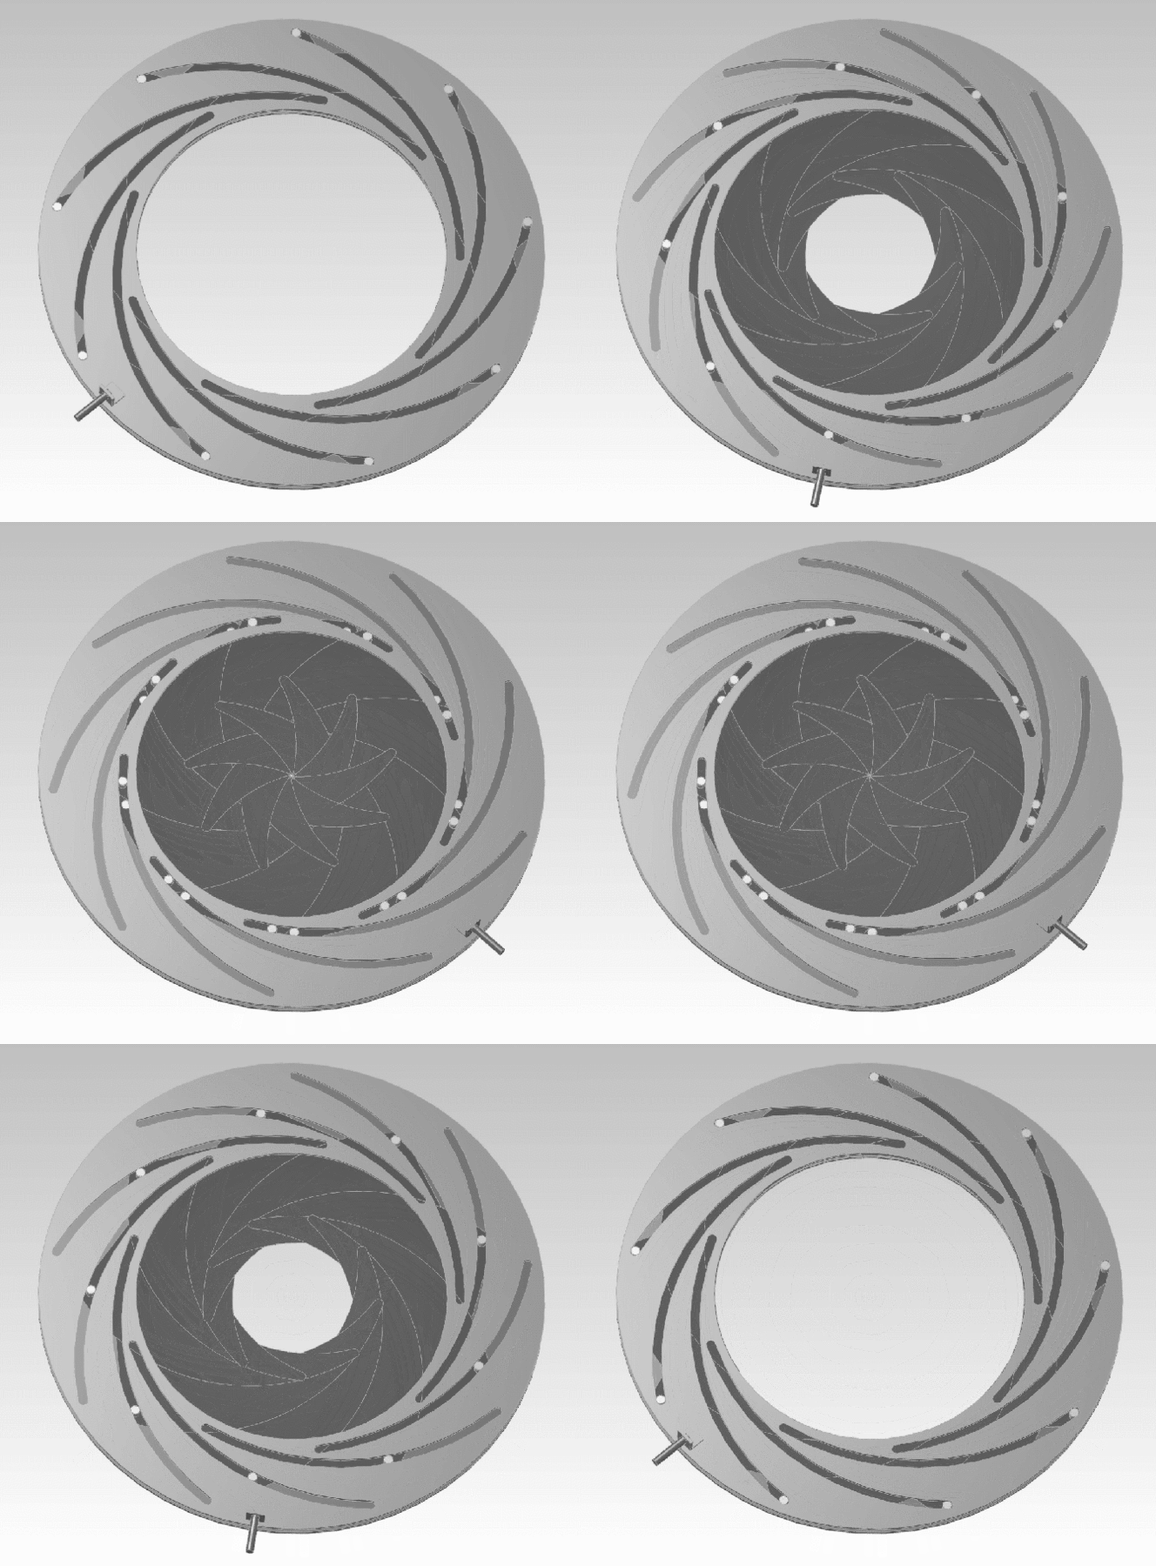
Check out the illustration below of an Aperture Diaphragm Iris in action courtesy of Wikipedia.
Pretty cool right? I thought so and it looks like one of those cool doors from star wars or something. Also, note the aperture is referred to as “Wide Open” when it’s in the fully open position, and “Stopped Down” when it’s anything but wide open really 😉
When you “Open Up” the aperture your going towards your lenses widest setting. The term makes sense especially when you look at the aperture itself. Now, if I change my aperture to f/8 I would be “Stopping Down” the lens. Basically, stopping down the amount of light that can travel through the lens by closing the star wars door a few “f-stops”.
Depth of Field
DOF for short, is simply the distance in front of and behind the focal point that appears to be sharp. In reality there is only one distance that the subject is actually in focus, because the focus fades away gradually in front of and behind the focal point. However, as the focus falls off from the focal point there is still an area that appears to share. That area is known as the Depth of Field. There are 3 factors that effect the DOF. Aperture size, Focal Length, and Distance to the subject from the camera. Aperture is the easiest way to control the DOF, as you can simple dial it in for the most part.
Below are example diagrams of what the depth of field kinda looks like. You can clearly see that within the DOF lines the subject is considered acceptable sharp.
DOF is pretty much always referred to as Shallow or Deep, Short and Long, or Small and Large. I prefer to use shallow and deep myself, but it doesn’t really matter what you call it as long as you know what it is and how it effects your photography.
One point that needs to be stressed and understood about DOF is that there are many variables that effect it. We have the Aperture itself, focal length of the lens, distance to the subject, distance of the background in relation to the subject and the camera, and what type of camera sensor size your using. I prefer the full frame sensor of my 5D mark II over the 40D 1.6x crop factor sensor, because there is a much shallower DOF on the full frame sensor due to it’s larger size.
Here is a great Depth of Field Calculator I found – Depth of Field Calculator >>
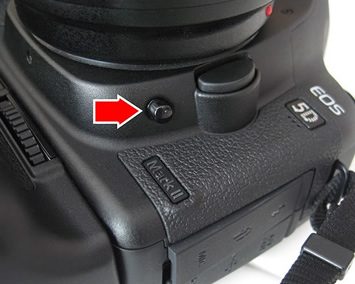
This Depth of Field business can get a little confusing, so when in doubt use the DOF preview button on your camera! Most SLR’s these days have a depth of field preview button on them. In the image to the right, you can see what it looks like on most DSLR’s.
The DOF preview is an awesome tool and I highly recommend taking advantage of this feature. Basically how it works is pretty simple. The camera only sets the aperture you chose when the shot is actually taken. So when you look through your eyepiece and press that preview button, the aperture actually adjusts to the setting you have set giving you an accurate view of your DOF. When you let go the aperture opens back up so you can see unobstructed again. However, the higher the aperture the smaller the hole is for light to get in, and as a side effect your preview will get darker as your move down in aperture. Try it out!!
On the Sony Nex style cameras, the aperture is constantly adjusting live! So the depth of filed will be accurately represented on the LCD screen or in the view finder.
[divider]
Circle of Confusion??
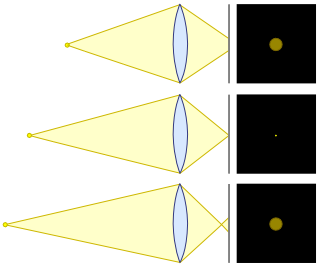
To the right is the Circle of Confusion diagrams I found on Wikipedia. You can see at the focal point in the middle image there is a nice sharp dot, then x amount in front and behind the focal point the circles get out of focus indicating that the DOF has run out. The further you go from the focal point the more oof your foreground and background will become. Depending on the factors of DOF, it could be a lot or a little.
In the image below I remember seeing these flowers from the highway the day I got my thrifty 50 lens 🙂 The Canon 50mm f/1.8 II that is. I promptly exited and set the aperture wide open at f/1.8. I also made sure that I had the camera on the same focal plane as the flower. This way the stem and flower are in focus. If I was aiming even slightly up or down, the stem would have certainly been out of focus with a wide open aperture of f/1.8.
When to use which Aperture?
I get this question all the time, and it really depends on what your goal is, and what the conditions are. However, there are some very good rules of thumb to keep in mind for your typical compositions. See below for some examples.
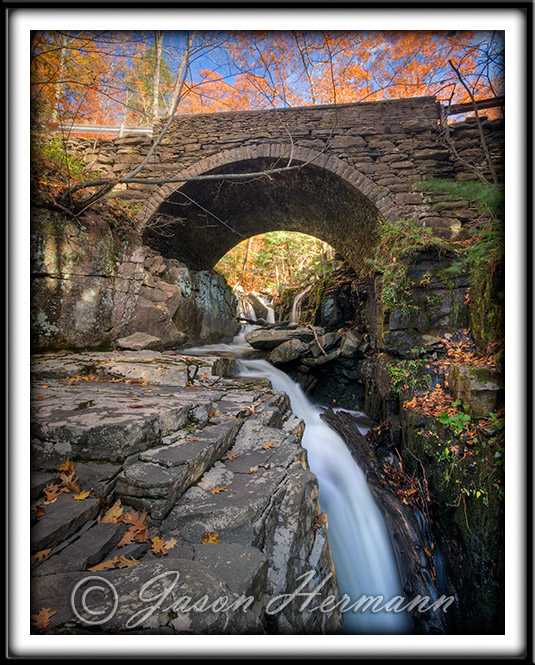
In the image below I really want the viewers eye to travel through the entire scene from front to back. So It was critical that the image was sharp and in focus from front to back. So I went with an aperture of f/16 on my Canon Rebel XTI, and ultra wide angle Sigma 10-20mm lens. I then focused about 1/4 of the way up the frame on the rocks in the foreground. It was several feet in front of me and I knew from experience using this lens, that f/16 would do the job and get a nice sharp scene from foreground to background.
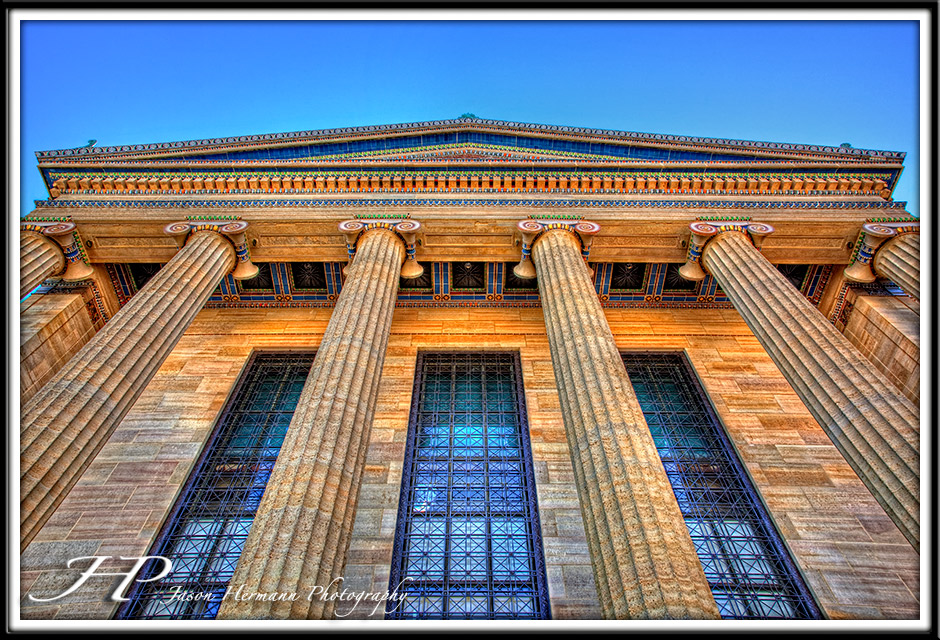
In this image below I pretty much had the same concept to deal with as above. I wanted the scene sharp from front to back. I used my Canon 5D Mark II and the Canon 17-40 f/4 L lens for this image. I had the Aperture set to f/16 and I used my Manfrotto tri-pod to keep things steady. I then took 3 exposure’s using the AEB (auto exposure bracket) feature so I could create an HDR Photograph.
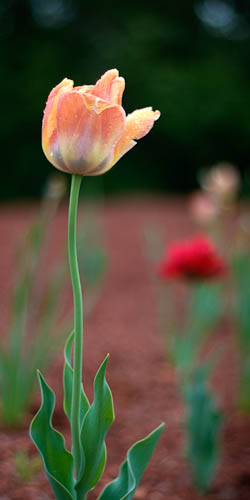
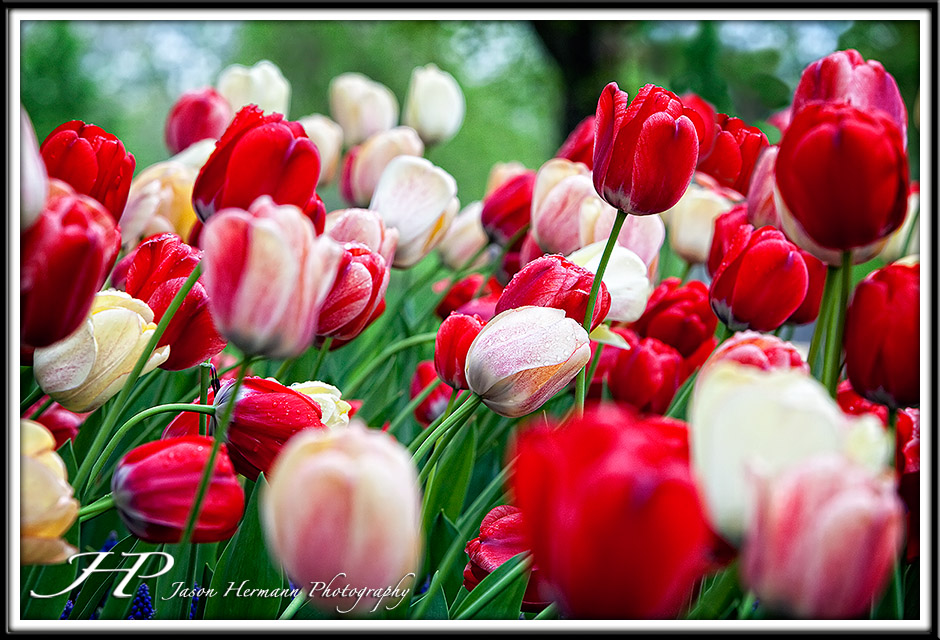
In this next image I was going for that layered composition where the foreground is out of focus and the background is out of focus, but a small section in between is tack sharp. It makes for a killer composition in the right situation, and this tulip flower garden is a great place to use it! I was using my Canon 70-200mm f/2.8 L IS lens on my 5D mark II which is one of the best camera/ lens combos ever!! In any event I was really close to the flowers in the foreground and I wanted a good inch or 2 of DOF, so I set the camera to f/8 and fired away.
In this next image I was going for a super shallow Depth of Field so I would get those really cool specular highlights 🙂 I set my Canon 5D Mark II at f/2 in Av mode as I was using my Canon 135 f/2 L lens.
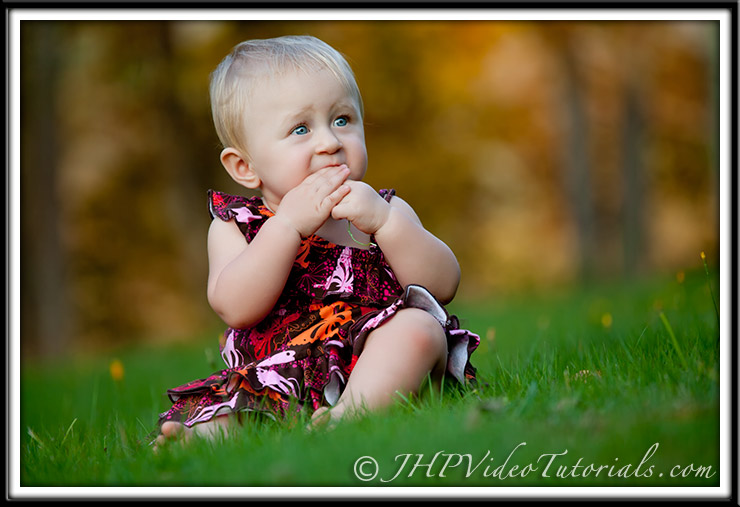
Here is another example of the DOF Layering Effect as I like to call it 😉 This is my niece Allison and she is incredible adorable and photogenic! In this image I was laying on my belly armed with the 5D Mark II, and the Canon 100-400 L. I knew I wanted that cool out of focus layering composition, so I set the lens wide open in aperture priority mode and fired away! The camera settings for this image were f/5.6 @ 1/250sec, 320mm, ISO 500, handheld.
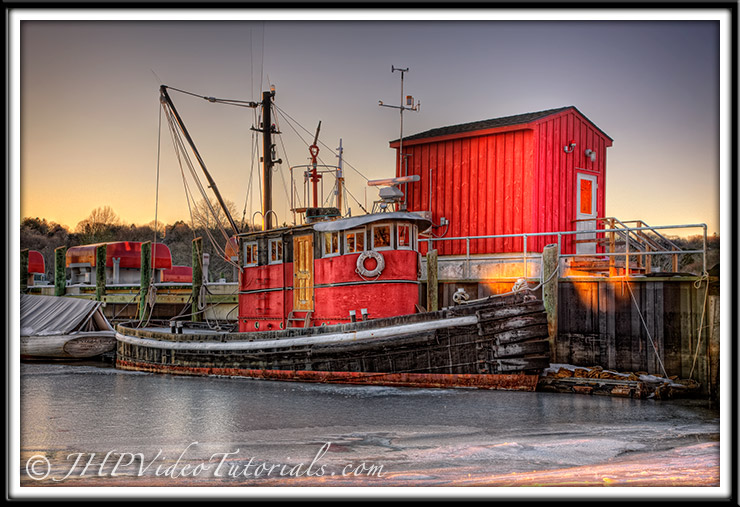
In this next image I was pretty far away from the subject and using a my Canon 17-40 f/4 L and my 5D Mark II. So the Aperture wasn’t that important as far as DOF was concerned, so I set my camera to f/8 and used AEB so I could take multiple exposures as I was shooting for an HDR Photograph.
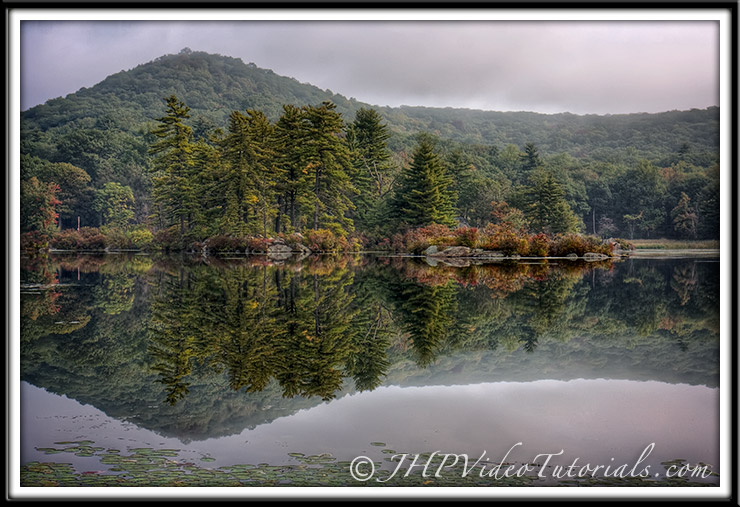
In this photo below I was cruising through Harriman State Park – NY and the water was like glass! I shuffled my way down to the shoreline and was just blown away by the incredible lighting and reflection of those pine trees. The reflection was so far away that the aperture really didn’t matter so I set it to my lenses best setting for sharpness which is f/8 and took the shot. The camera settings as a whole were: Canon 40D, Canon 17-55mm f/2.8 IS, set to f/8 @ 1/50sec, ISO 100, 33mm, tri-pod
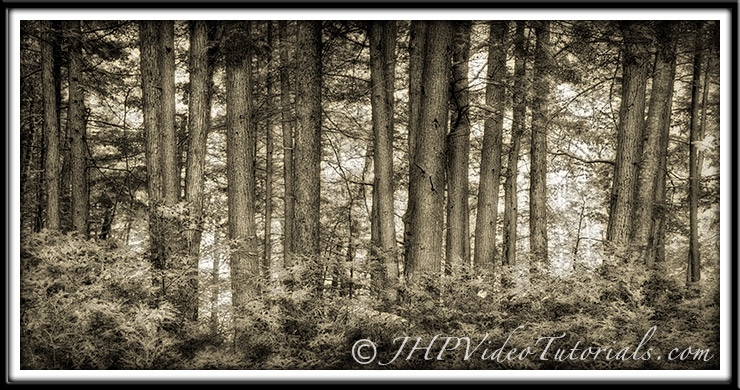
In this photo of the trees it really didn’t matter that much what aperture I used, so I set my 5D Mark II at f/8 which is the lenses sweat spot and took the shot 🙂 All I was concerned with in this image was the trees, and f/8 would certainly do the job at the distance I was at. Also, f/8 is the prime spot on my lens as far as sharpness, and contrast.
Now in this next image I wanted to get a little creative with the composition, and use the aperture to accomplish my vision. I wanted to get those cool specular highlights in the bokeh of this image using our Christmas tree. So, I posed Sadie (not really she just lays like that), and I set the Aperture to “wide open” on my f/1.8 lens with the tree being about 8 feet or so behind Sadie girl 🙂 I was very happy with the resulting image!
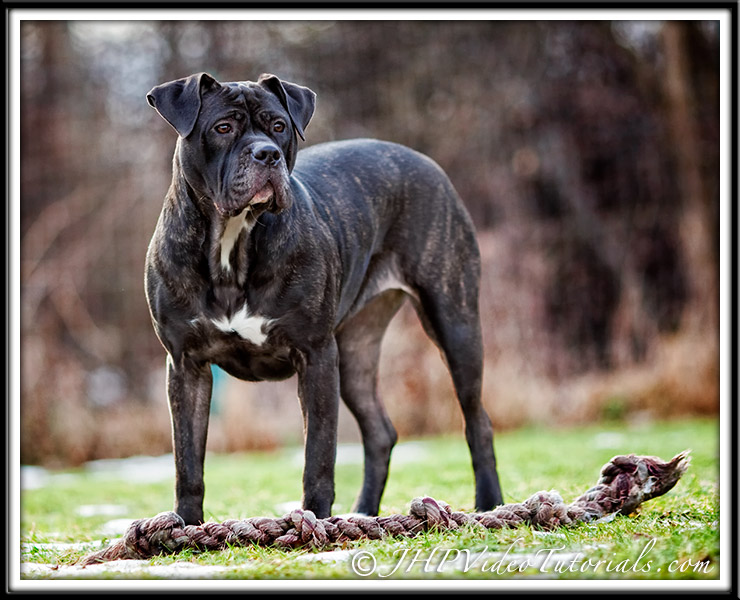
In this image below of Abby my Brother’s dog, I really wanted to try and isolate her from the background and it just so happens I got the Canon 135mm f/2 L Lens for Christmas a few days before I took this image 🙂 There is a wire fence about 30 feet behind her, but you can barley tell and it doesn’t take away from the image at all now. So anyway, I set my aperture to f/2 in aperture priority mode on my 5D Mark II, and fired away.
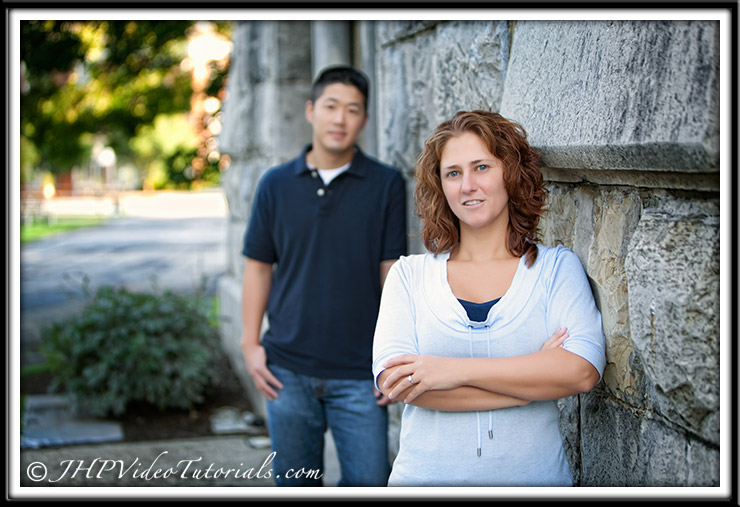
In this next image of a great couple we shot a wedding and engagement session for, I wanted the image to have some depth to it. I also wanted the emphasis on Angela with Ji in the background sorta on looking with love. So in order to accomplish this I had to set my aperture to f/2.8 on the Canon 5D Mark II and Canon 70-200 f/2.8 L IS or so and take the shot. The resulting image was pretty cool and the customers loved it!!
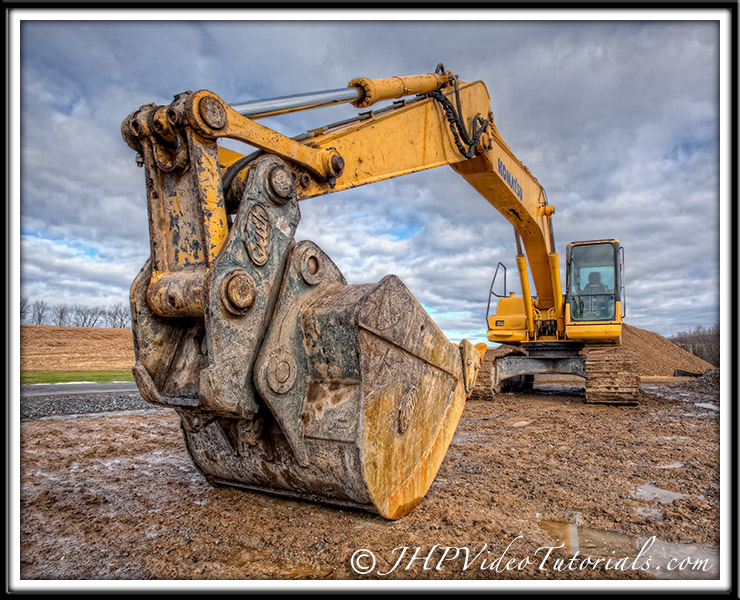
In this image it was critical that everything from front to back was in focus, so with the 5D Mark II and the Canon 17-40 f/4 L I anchored down my tri-pod and got busy 😉 I set the aperture to f/16 and took multiple – exposure’s using AEB (auto exposure bracketing) as this is an HDR photograph.
Closing Remarks
This concludes my Understanding Aperture as it relates to Photography Tutorial, and I really hope you you got something out of this article!! Aperture is so powerful when it comes to creative photography so I highly recommend you set your camera to A Mode and/or Manual mode and start playing around!
Please feel free to ask questions if you have any 😉
Jay

