
Continuing with the Sony Nex-6 testing I took a bunch of Auto HDR Photos and a few Auto Pano Photos!! I love these two in camera post processing features, because they do a really good job considering it takes zero effort, and just a little bit of time to process on camera.
Sony Camera Technology is ahead of the curve in a lot of ways, but these features are making there way into cell phones, and many other camera companies like Fuji and Olympus are starting to add these features as well. Sony for the most part innovates all this technology, and then the others tend to fallow in step. This has been going on for a number of years and one of the reasons I jumped the Canon ship in the first place!!
Sony Nex-6 and Auto HDR Mode
The Sony Nex-6 has a great featured called Auto HDR if your not familiar 😉 Basically what Auto HDR does is take multiple photos at different exposure values, and then combines the photos to insure detail retention in both the highlights and shadows!! The Sony camera then aligns the exposures, and blends them together using a proprietary method. It does this all in a few seconds, and you don’t even have to use a tri-pod, although I recommend it.
You may think, why would I need this?? Well, when a scene is super bright and has shadows in it as well would be one example. Another example would be a photo with the Sun in it or bright sky, and yet another would be a dimly lit room with really bright windows, or candles in it. Pretty much scenes that your camera would not be able to capture with one exposure due to highlights blowing out, or shadows clipping out to black.
A Few Tips for using Auto HDR Mode
- Don’t use Auto ISO in the Autp HDR Mode.
- Make sure you holding the camera rock solid if your not using a tri-pod
- Take multiple frames using different EV Spread options to get best results in camera
- Use the Histogram in the Playback menu to insure you captured all the highlight and Shadow information on the Auto HDR photo. If not move up in EV spread al the way to 6 if necessary!
- Don’t be afraid to use exposure compensation to swing your exposure one way or the other if your results aren’t the correct exposure
- When in doubt, meter the scene first and find out what the brightest areas and darkest areas are. Then expose for that with the appropriate EV spread. With practice this becomes easier.
Lets take a look at a few examples, and then I will go over the actual Auto HDR Settings on the Sony Nex-6.
Setting the Nex-6 for Auto HDR
Setting up the camera for Auto HDR is very simple!! Basically you will need click the Menu Button and then go to Brightness/ Color then DRO/ Auto HDR. Now once your in here you will need to use the scroll to select the Auto HDR mode. Default was DRO Auto for the Sony Nex-6. I Also changed the Dynamic Range Optimizer from Auto to DRO Lv1 while I was in their, because Auto adds to much fill light into the shadows in my opinion. In any event, once you scroll to the Auto HDR option, hitting the middle of the wheel button will confirm your selection. However, note on the bottom right of the screen where it says Option. You need to select that in order to change your EV spread. The higher the EV # the more dynamic range the Auto HDR will be able to capture. If you use to much EV Spread your images will just look a bit flat and non contrasty. Simple lower the EV spread and try again 😉
Another cool feature of the Auto HDR, is it gives you a normal exposure of the scene as well as the hdr. So you get two images saved to the memory card for every Auto HDR you take.
I also put a video tutorial together on exactly how to do this over Here: How-To: Auto HDR on the Sony Nex-5n >>
Sony Nex-6 Sample Photos With and Without Auto HDR
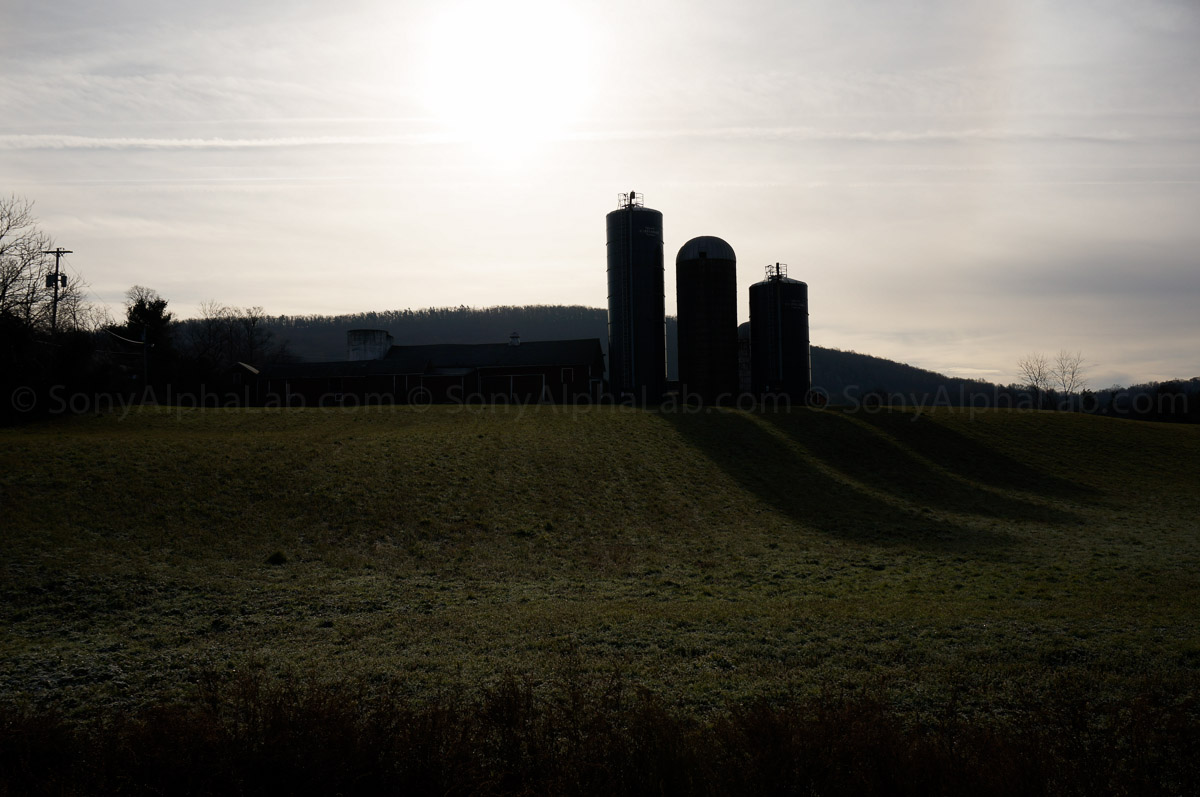
In this first Auto HDR photo I was shooting directly into the sun and the shadows were very dark as well. The long silo shadows are actually what caught my eye from the road as I was driving 🙂
Here is what the normal exposure looks like first:
Be Sure to Click on the Photos for the 1200px Version!!
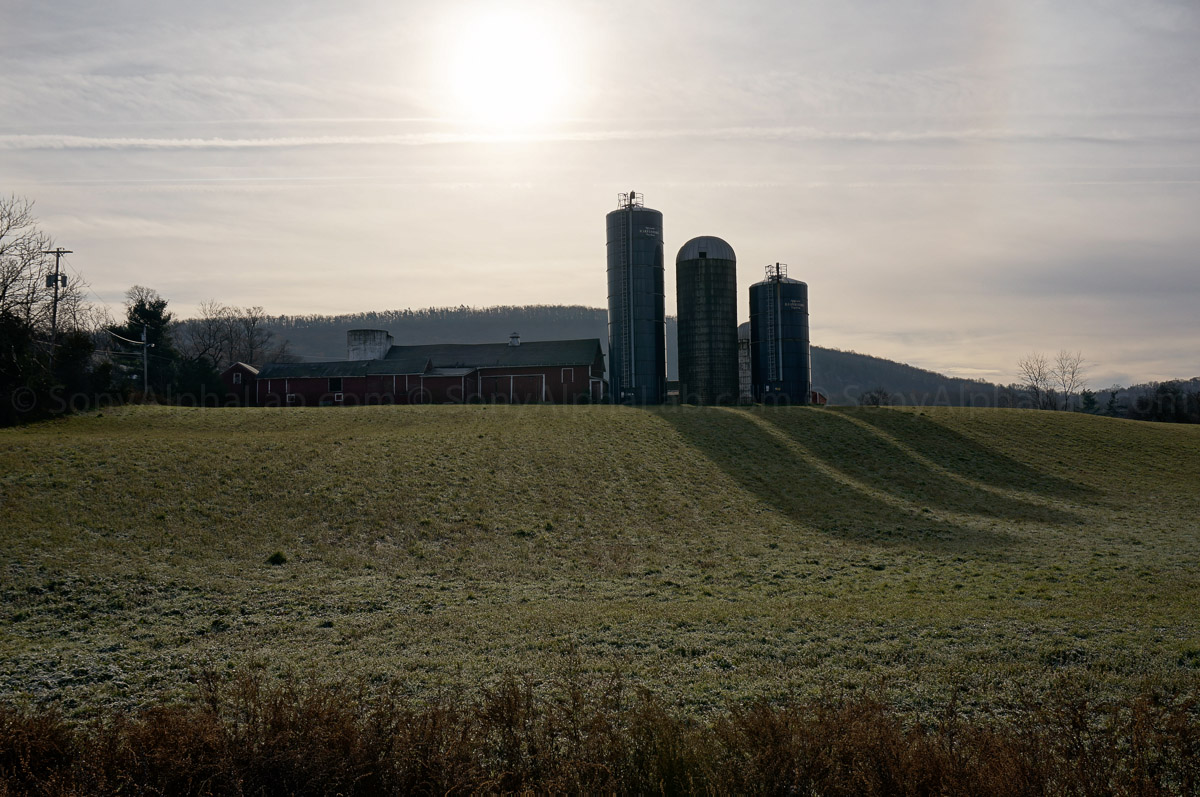
This next image is the Auto HDR Version @ 6 EV:
This next scene was a old school pick-up truck with a very detailed paint job!! The truck and building have tons of color, dark shadows, and detail!! The top right corner is really bright and pretty close to where the sun was in the sky.
Normal Exposure:
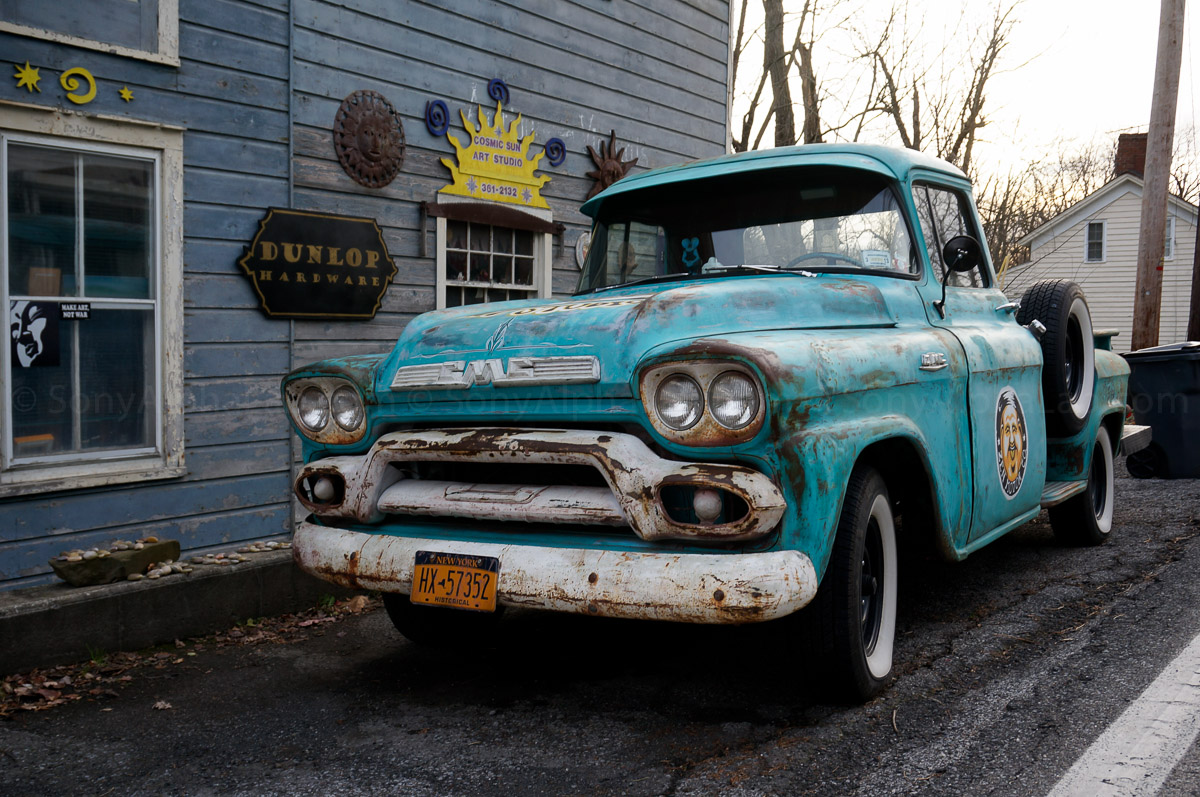
Auto HDR @ 6EV:

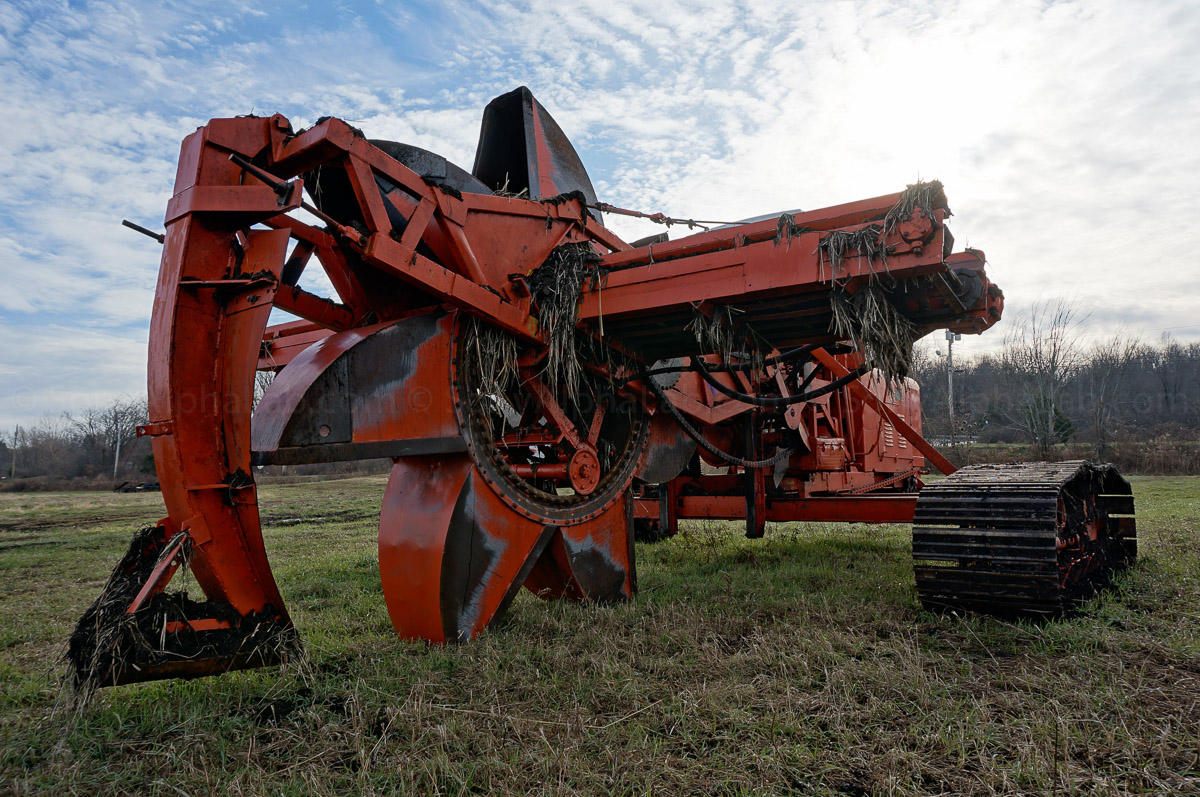
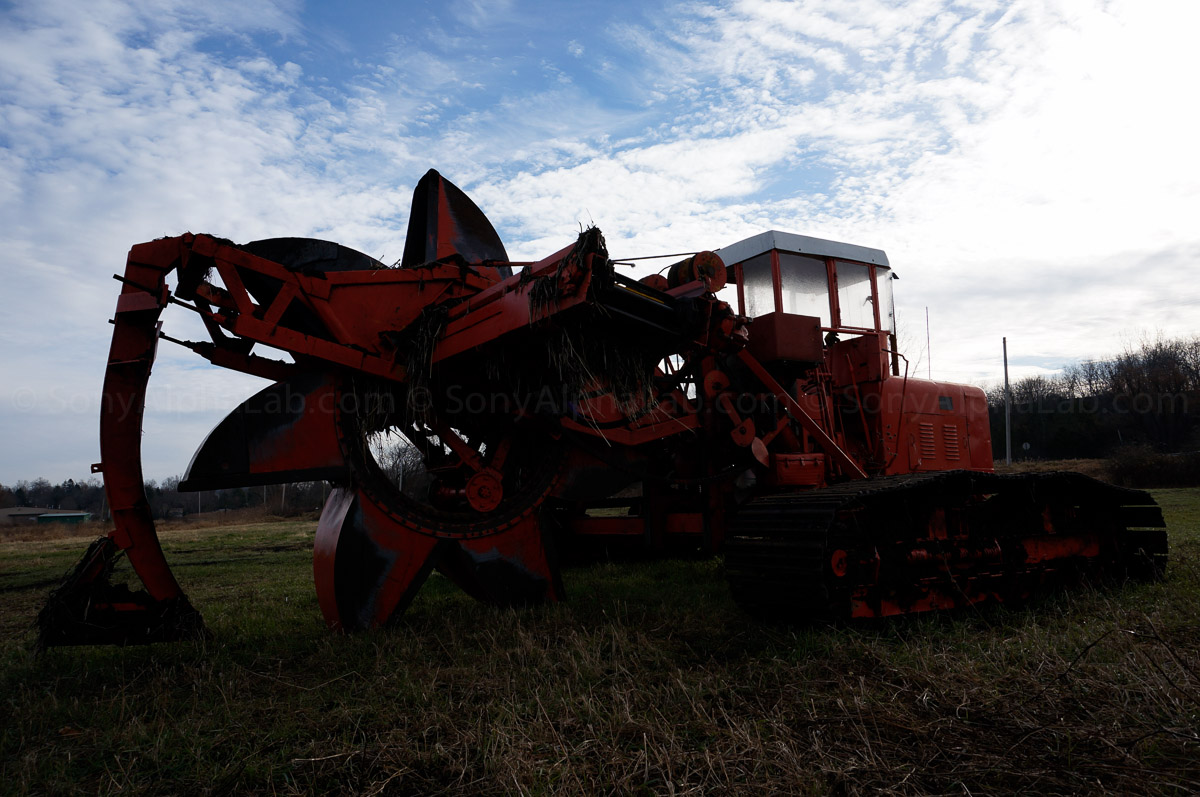
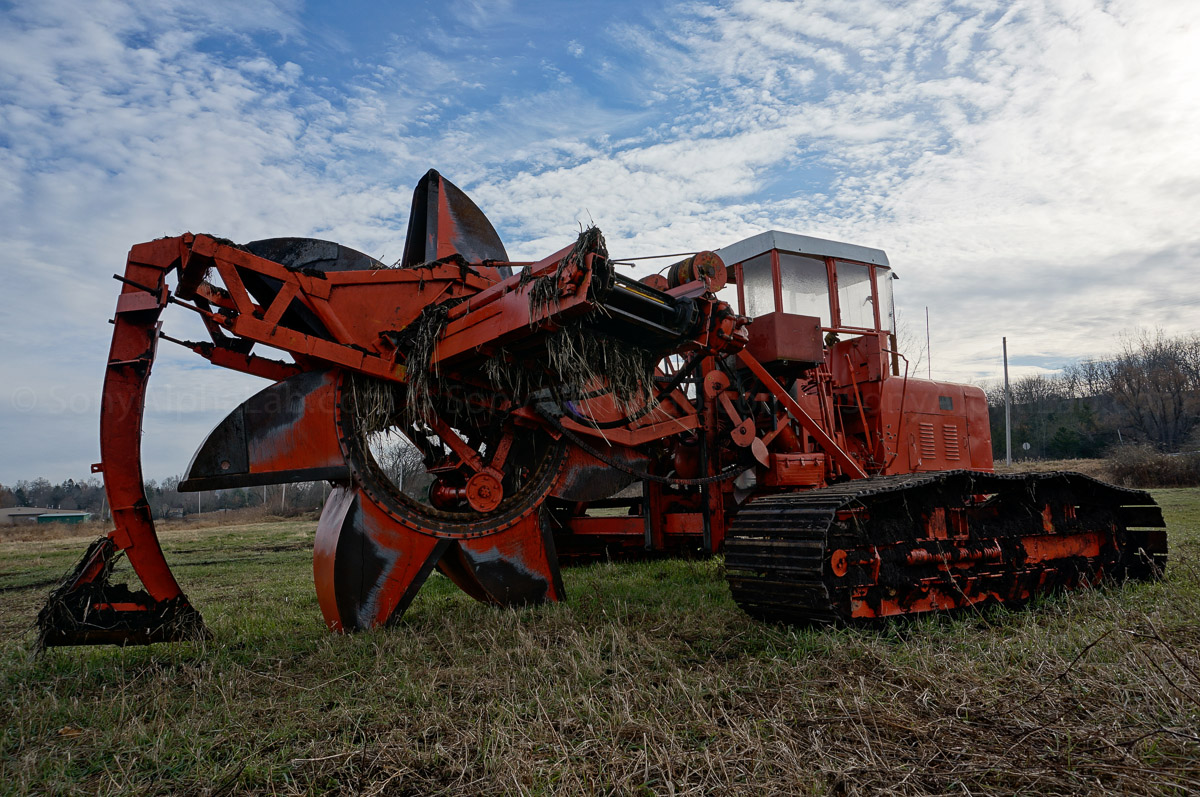
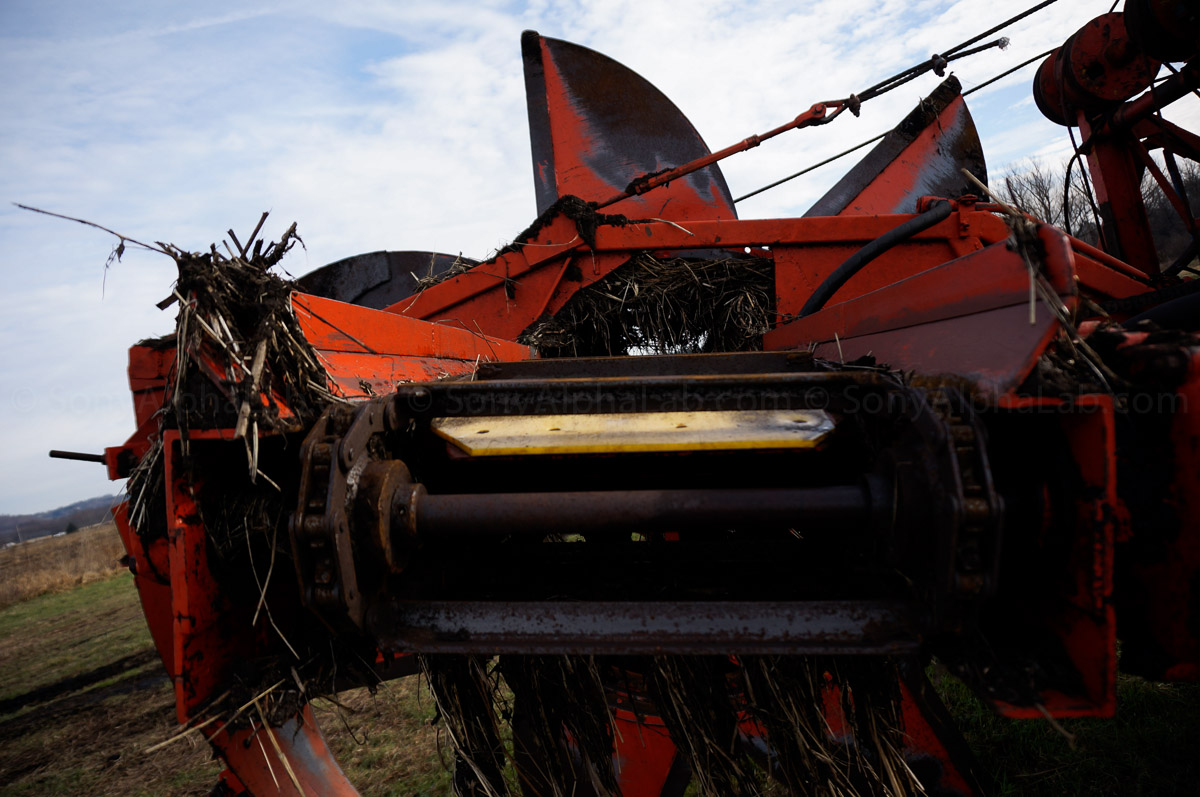
Next we have an awesome drainage ditch digger for these black dirt fields by my brothers house. This machine basically straddles the trench and then digs it deeper and spits out the mud on the left and the right side. Really interesting to look at, and Auto HDR was needed, so I took a bunch of pics!!
Normal Exposure:

Auto HDR @ 6EV:
Regular Exposure:

Auto HDR @ 6EV:

Normal Exposure:

Sony Nex-6 Auto HDR @ 6EV:
Normal Exposure:
Auto HDR @ 6EV:

Normal Exposure:

Auto HDR @ 6EV:

Closing Remarks:
As you can clearly see from these Auto HDR Sample Photos using the Sony Nex-6 and the 16-50mm Power Zoom Lens, it can drastically alter your photos by added detail in the highlights and the shadows!! I’m honestly amazed by how good Auto HDR works most of the time. Sometimes is just doesn’t look good no matter what EV you use, but it’s usually just terrible lighting or a bad photo to begin with. It’s also important to note that a lot of scenes don’t necessary need Auto HDR, but it can add a nice fill light effect with a lot less noise than pulling out of the jpeg image after the fact in post.
If your looking for professional grade results, I would not recommend using this feature. As good as it is, it’s a Jpeg image that leaves little for post processing further. If you have the time, I recommend shooting raw and then using a program like Photomatix Pro for the HDR Composite. You will get a much better quality 16-bit tiff image in the end. That image can then be heavily edited and pushed in Photoshop yielding incredible results!! I also recommend a very sharp lens, a rock solid tri-pod, and a self timer or cable re-lease for as little vibration as possible.
Please feel free to ask questions if you have any,
Jay
Nex-6 Price: ~$848 US (body Only)
Nex-6 (body only) ~$848 US @ BHPhotoVideo >> | Amazon >> | Adorama >> | Ebay


