
There is a lot to learn when it comes to digital photography, and one of the best topics to start with is Exposure. This tutorial will go over all the key factors that relate to exposure and give tons of sample photos illustrating the How, and Why.
Exposure in it’s simplest form is controlling the light. A combination of Aperture, Shutter Speed, and ISO are the tools we have as photographers to control the light with a digital camera. A “good” exposure is the correct blend of all three tools depending on the given situation, and what effect the photographer was going for. This is a very important concept to understand!! As the photographer your in control of the exposure, so you can tell the camera to do things that Auto Mode would never allow!! Therefore, the “correct” exposure could be totally different with the same exact scene, depending on camera settings, filters, off camera lighting, etc.
Your digital camera when set to an Auto Mode will figure out the exposure on it’s own using it’s built in light meter and a variety of other criteria that help it determine the correct exposure.
Be sure to click the image for the 1200px Crisp Version!!
How Exposure Actually Works
When you point your camera at any given scene in Auto Mode the advanced scene recognition technology will take over, face recognition technology possible kicks in depending on the camera, and then the camera will make a educated guess on the exposure. It will chose a blend the three exposure tools available!! (Aperture, Shutter Speed, ISO).
Amazingly the camera produces a solid exposure most of the time these days!! Sony in particular has taken it to the next level with it’s facial recognition technology(it’s been around for some time). Basically, if the camera see’s a face it prioritizes focus, exposure, and other effects if enabled, towards a portrait type exposure and then takes the shot. The Sony’s do such a good job they almost asks you to leave it on auto !! The camera actually said that to me 😉
In-camera light metering works awesome with most subjects in most lighting situations, but there are tricky scenes that will fool your in camera occasionally!! Snow is a classic example of this. Cameras notoriously under-expose snow scenes, because your cameras light meter is not looking for pure white and does what it thinks it should do with the scene, underexpose.
The latest Sony cameras have really advanced scene recognition software built in!! Superior Intelligent Auto Mode in particular which is found on the Nex-F3, A57, and A37, you can bet the camera will actually get it correct almost all of the time. This super advanced auto mode really is incredible and I used it on the Sony A57 for quite a while with total amazement at the results.

How the Exposure Actually Happens
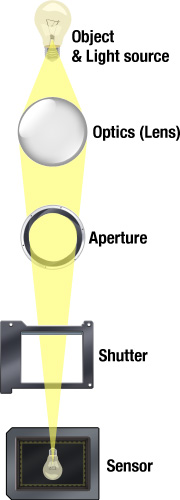
Check out the illustration on the left, and notice how the Light travels through the optics and relates to each element of the exposure process. ISO is controlled on the sensor, but notice how the Shutter and Aperture work in tandem with the sensor and lens! They all work together and relate to one another is the concept you need to grasp here. Basically the light travels thru the lens optics and gets shaped into what the sensor, and photographer wants to see. The optical quality of the lens basically determines how good the light gets shaped and controlled before it hits the shutter. The Aperture changes the angle at which the light is focused and sent to the sensor. The shutter then simple controls the amount of time the sensor is exposed to the light source.
Aperture
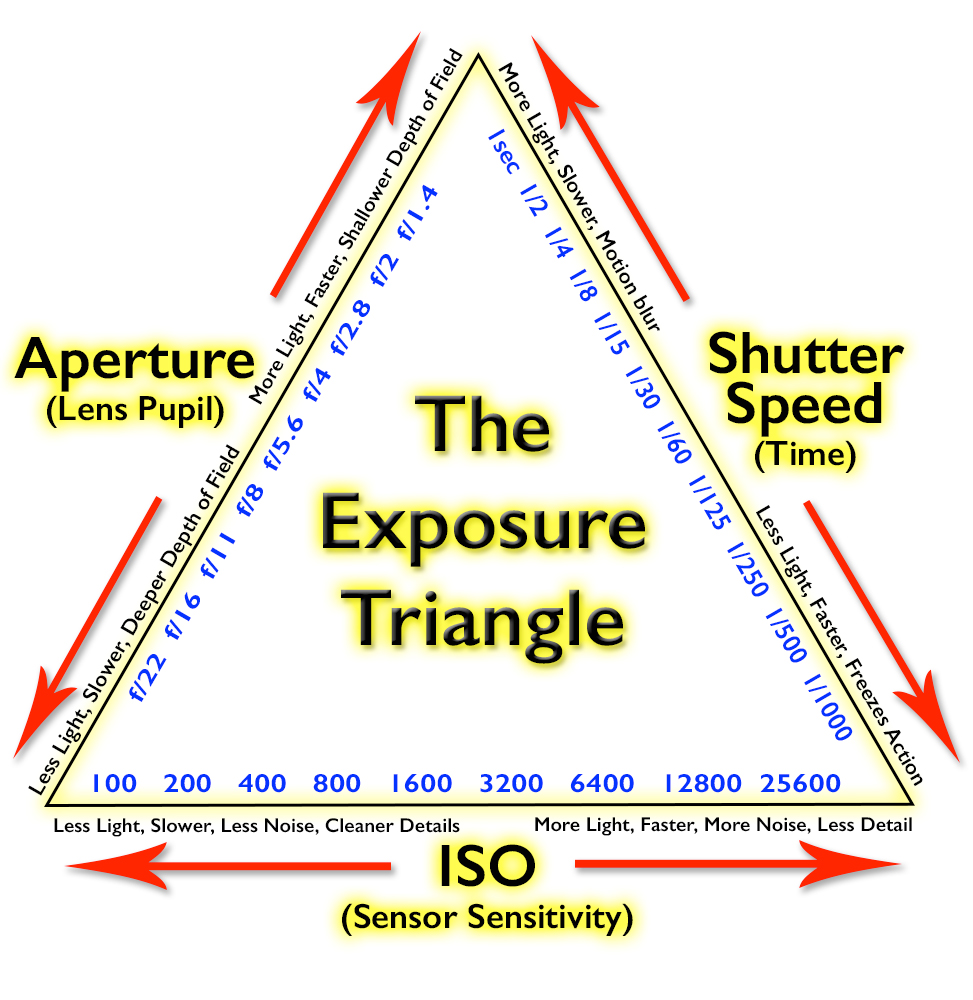
Aperture is the tool that controls the light flowing though your lens in increments know as f-stops. Aperture also controls Depth of Field which we will discuss later 😉 Basically the light travels through the lens like water through a pipe. The Aperture is the valve the can slow the flow of water or in our case light 😉 Check out the illustration on the right, see what I mean? f/16 is barley letting any light thru, and f1.4 is pretty much wide open!!
Aperture settings are called f-stops and indicate the size of the actual aperture opening. Each f-stop lets in half as much light in as the next larger opening and twice as much light as the next smaller opening. It’s a circle, so the math involves pie if your wondering.
Shutter Speed
The shutter is what controls how long the Sensor is exposed to the light source. Basically the time of the exposure is all the shutter has to do. The longer the shutter is open, the more Light that can flow in to fill up that sensor with information. In a dark scene the shutter will need to be open longer than in a bright scene.
Shutter Speed also has standard values for Full Stop Increments just like the Aperture and ISO!
1/1000, 1/500, 1/250, 1/125, 1/60, 1/30, 1/15, 1/8. 1/4, 1/2, and 1 full second
ISO
The ISO is basically how sensitive the camera sensor is to light. The higher the ISO the more sensitive, and the lower the less sedative. A great analogy about ISO I read once by Bryan Paterson. his analogy was to picture the ISO as worker bees. At ISO 100 you have 100 worker bees on your side trying to grab up all the light coming in. At ISO 200 you have twice as many worker bees trying to capture the light, therefore it will take 1/2 the time. So in other words lets say I have my camera set-up to take a picture and the I’m at f/4 1/250sec ISO 100. Now I change the ISO to 200 and something needs to adjust to get the correct exposure. So I scroll on the shutter speed and guess where the correct exposure winds up at?? 1/500sec!! Exactly half the time is required to get the same exposure with ISO 200, because it has twice the sensitivity, or worker bees 😉
High ISO is usually needed to get a good shot in low light. New cameras these days are coming out with ISO as high as 25,600! That right ISO 25,600 or even higher. Another factor of ISO that is important to remember is noise. The higher the ISO the more Noise you will get in your images. This is caused by the sensor sensitivity (voltage/ power) being raised therefore it’s more susceptible to noise.
ISO also has full stop increments:
ISO 50 100 200 400 800 1600 3200 6400 12800 25600
Be sure to click the image for the 1200px Crisp Version!!

Recognizing Your Scene is Key!!
Recognizing the scenes in advance is key to getting more consist and accurate exposure’s!! Knowing that the camera is going to struggle in various conditions due to the limitations of the in-camera metering system is critical, and takes some work and experience on your part!! This will give you the fore-thought to adjust the camera in advance and get a much better exposure in those tough situations.
Sample “Correct” exposures
Below are a few examples of exposures that would normal not look very good, but because I know how the camera metering system works, I can adjust accordingly and get the “correct” exposure.
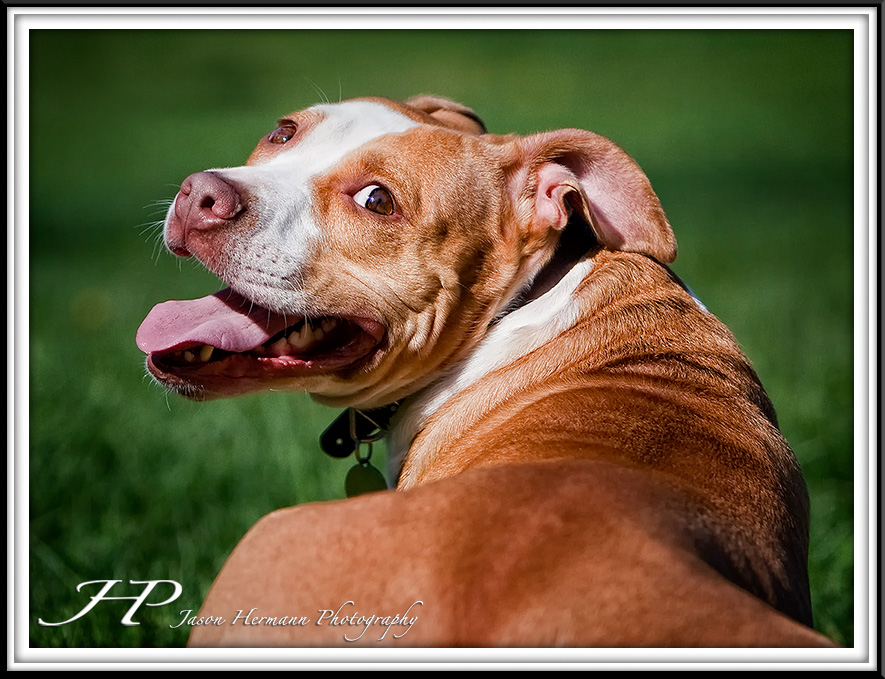
I took this image in the bright sun behind my brothers house. I new that Sadie’s white fur would want to blow out, so I used partial metering and focused on here eye/ face. That will tell the camera sensor “hey there is some info here we need to expose for” otherwise the camera would average out the scene and take into account for all the green. The result would have been Sadie’s white fur slightly overexposed. I wanted to get all the detail/ texture of the fur.
Canon 5D Mark II, Canon 70-200mm f/2.8 L IS, @ f/2.8 1/5000sec, ISO 200, Highlight Tone Priority enabled.
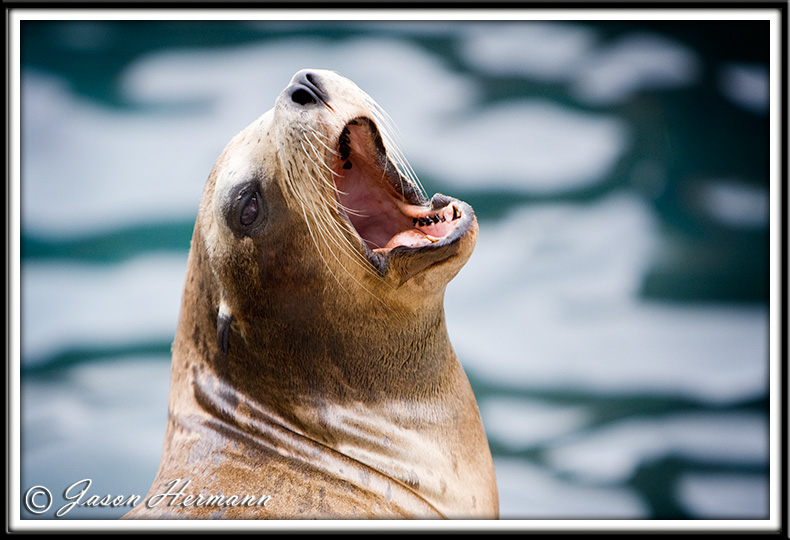
Notice how bright the background is on the image below of the roaring sea lion. If I shot this in Auto mode, the Sea Lion would be underexposed for sure!! Knowing this from experience, I used the Exposure Compensation while in Av (Aperture Priority mode) and added +2/3 exp/comp. That raised the exposure so I got the “correct” exposure!!
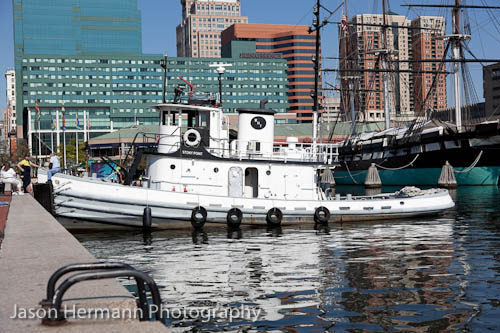
In this tug boat scene below the lighting was at it’s harshest, and from experience I knew the camera was going to under expose the bright white tug as illustrated in the image below.

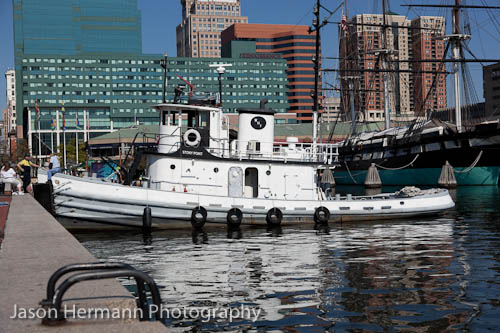
By simply adding a little exposure compensation (+1/2), I was able to get the “correct” exposure of the bright white tug!
Here is another example of a photo that your camera will screw up every single time!
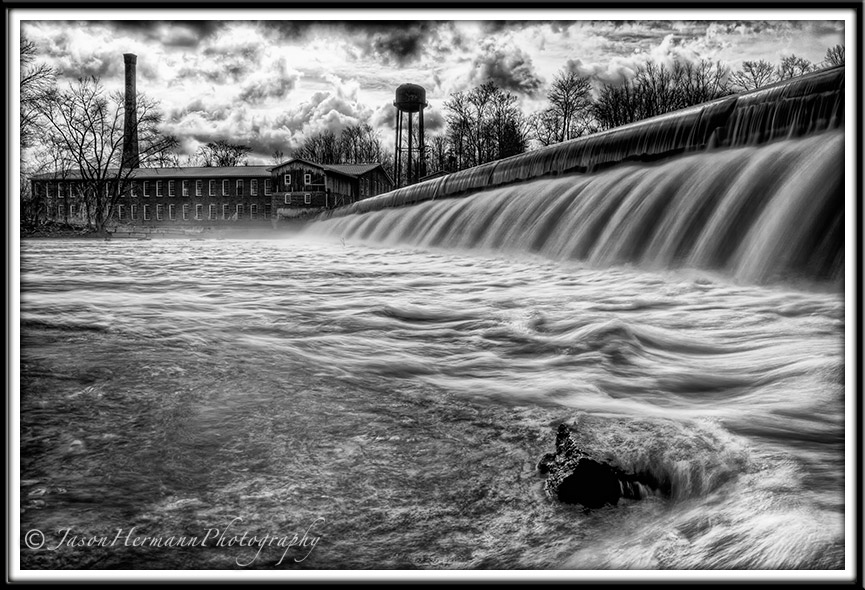
Be sure to click the image for the 1200px Crisp Version!!
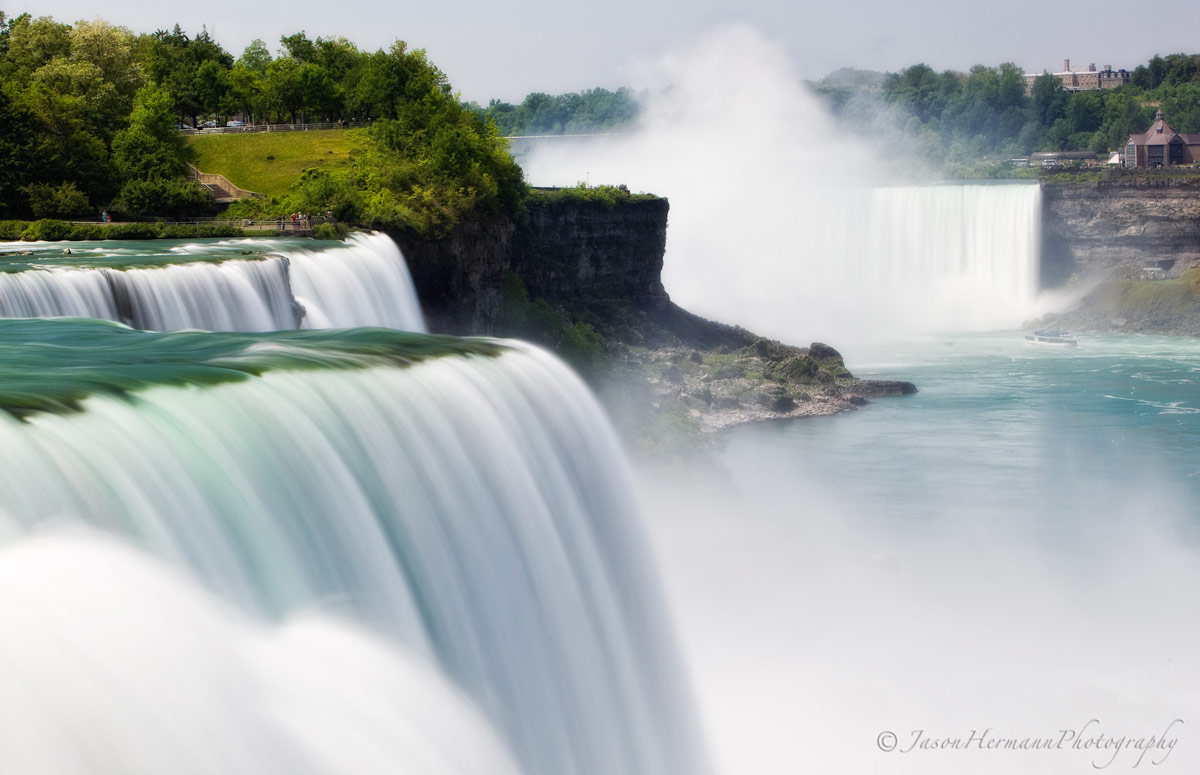
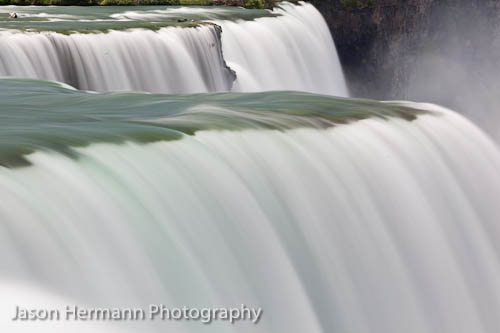
I went to Niagara falls a last year and knowing that white waterfall water will fool the camera sensor is critical to getting the “correct” exposure. I set the camera’s exposure compensation to +1.5ev, and this brought the water back to almost white as opposed to gray.
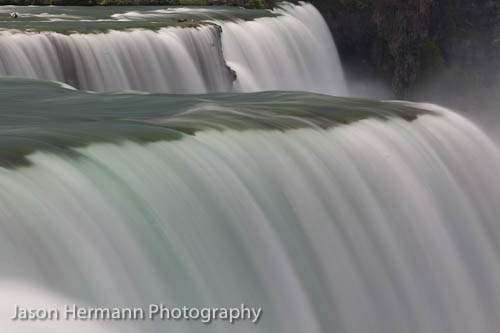
Take a look at these three exposure’s below:
This is what the camera decided was a “correct” exposure when using evaluate metering mode in a really tough scene like Niagara Falls.
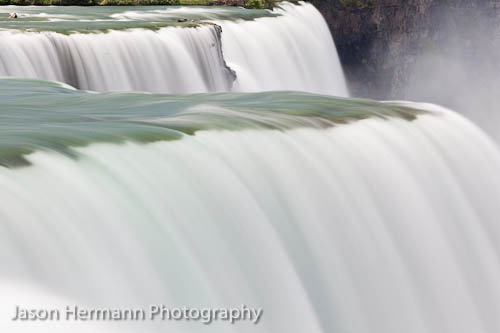
So I added +1 to the exposure comp and I got this: f/16 @ 2sec ISO 50, SO by adding 1 full stop of exposure bias the camera added 1 full second to the shutter speed for me, therefore doubling the amount of time the shutter is open and yielding a much better result.
+1 was still not enough though so I went with + 1.5 and got this “correct exposure”
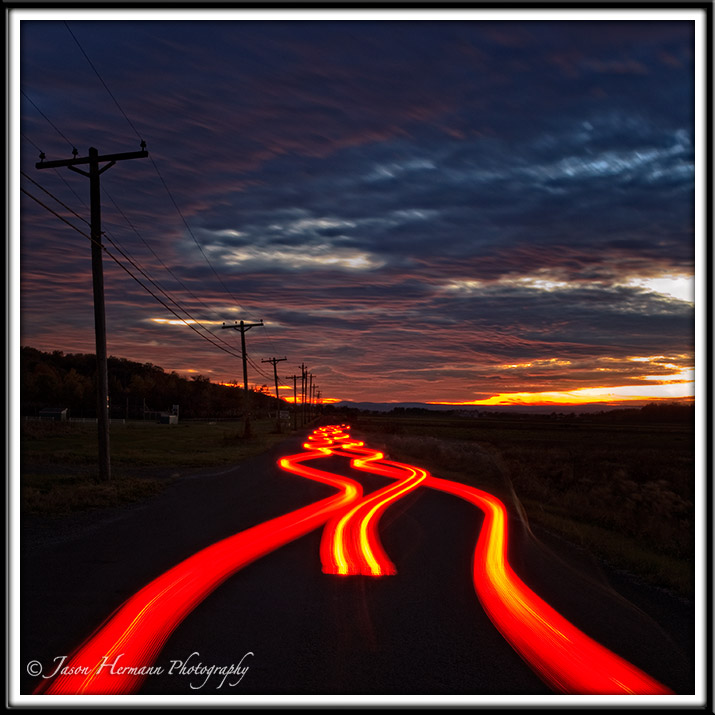
In this next image, the sky was incredible and I knew I wanted to get a pretty long exposure in order to capture the taillights. I did not have any filters to help slow the shutter down, so I set the camera to f/20 or so, and the lowest ISO setting, which gave me the longest exposure possible. Michele drove 😉 If I were in auto mode, the camera would have froze everything and probably put the flash up. Would that picture be be cool? I doubt it.
Taking control of the exposure is the name of the game if you want to get creative photos like this one below.
Closing Remarks
As you can see, getting the “correct” exposure is often not as simple as just pointing and shooting in auto mode. Although that does work really well, it’s not taking control of the exposure, and that is what photography is all about! You are in charge no the camera. The camera is just a tool to help you capture moments, and as the photographer, it’s your job to create the exposure!!
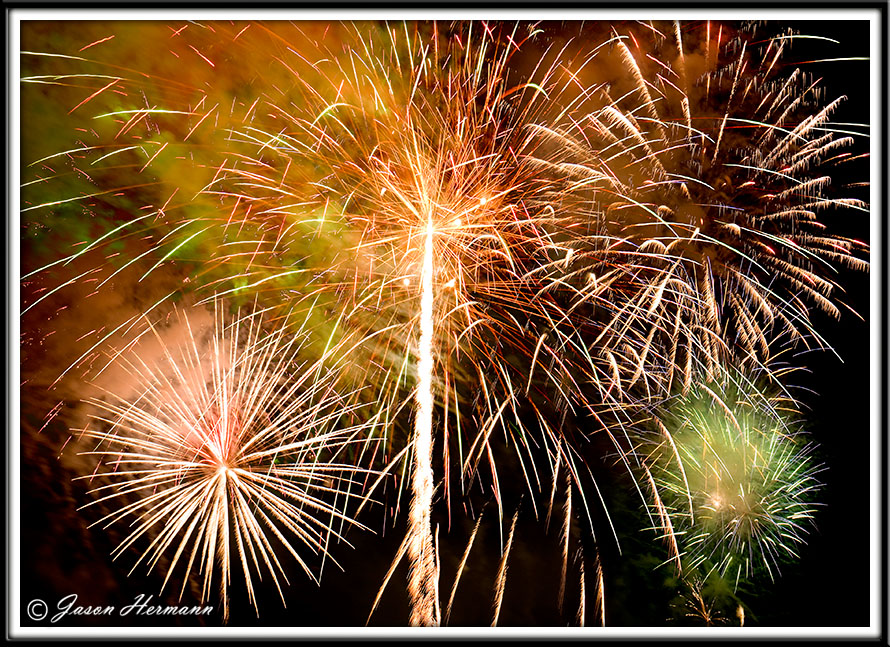
I hope you all got something out of this Article, and have a great 4th of July!!!
Jay


